
 | ||
Going up the raurimu spiral on the overlander
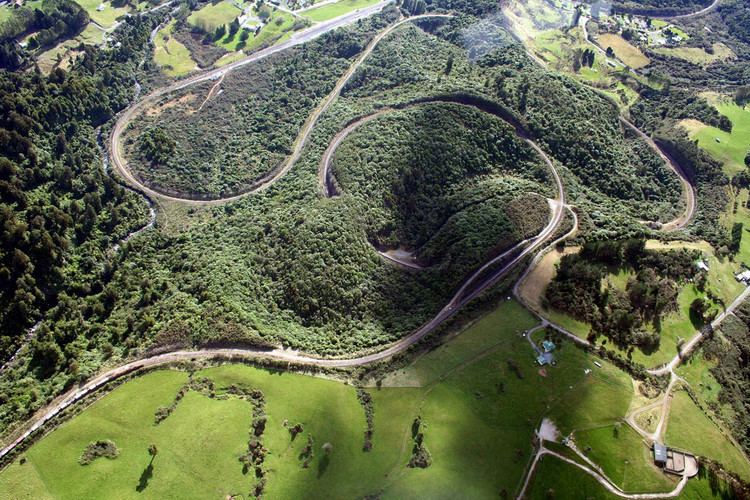
The Raurimu Spiral is a single-track railway spiral, starting with a horseshoe curve, overcoming a 139-metre (456 ft) height difference, in the central North Island of New Zealand, on the North Island Main Trunk Railway. It is a notable feat of civil engineering, having been called an 'engineering masterpiece'. The Institute of Professional Engineers (NZ) has designated the spiral as a significant Engineering heritage site.
Contents
- Going up the raurimu spiral on the overlander
- 29 may 2013 raurimu spiral in the snow
- Background
- Construction
- References
29 may 2013 raurimu spiral in the snow
Background
During the construction of the central section of the North Island Main Trunk railway between Wellington and Auckland, a major obstacle was faced - how to cross the steep slopes between the North Island Volcanic Plateau to the east and the valleys and gorges of the Whanganui River to the west.
South of Taumarunui the terrain is steep but not unmanageable, with the exception of the stretch between Raurimu and National Park, where the land rises too steeply for a direct rail route. A direct line between these two points would rise 200 metres (660 ft) in a distance of some 5 kilometres (3.1 mi), a gradient of 1 in 24.
The area was thoroughly surveyed during the 1880s in an attempt to find a route with a lesser grade, but the only viable possibility seemed to require a 20-kilometre (12 mi) detour and nine massive viaducts. Even then, the gradient would have been over 1 in 50.
Construction
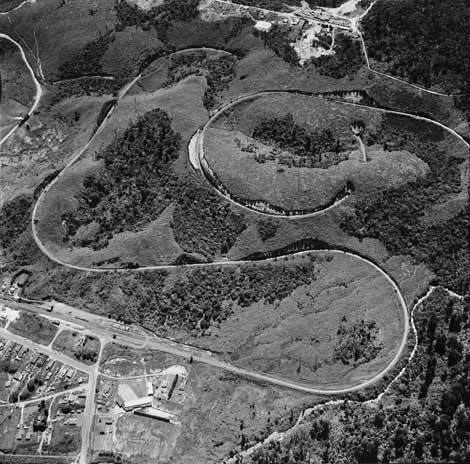
The problem was solved in 1898 by a since forgotten PWD surveyor in the employ of R. W. Holmes, Public Works Department engineer. He proposed a line that looped back upon itself and then spiralled around with the aid of tunnels and bridges, rising at a gradient of 1 in 52. Though costly and labour-intensive, the scheme was still cheaper than the previous plan by Browne and Turner which required 9 viaducts down the Piopiotea. Probably the most remarkable feature is that, even today, there is no place to view the complete line. By all accounts, Holmes visualised the layout in his imagination.
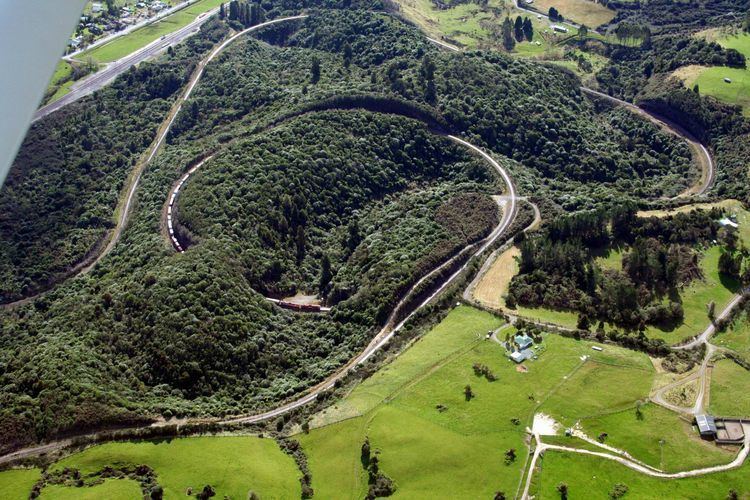
The railway forms an ascending spiral southwards, with two relatively short tunnels, a circle and three hairpin bends. From the north, trains pass Raurimu before going round a 180° bend to the left in a horseshoe curve, climbing above the track on which they have just travelled. Two sharp bends to the right follow, after which the line passes through two short tunnels. Trains then complete a full circle, crossing over the longer of the two tunnels through which they have just passed, before continuing towards Wellington. Two kilometres (1.2 mi) further on the line has two further sharp bends, to the right and then to the left.
After the second of these bends a train has risen 132 metres (433 ft) and travelled 6.8 kilometres (4.2 mi) from Raurimu - the straight-line distance is 2 kilometres (1.2 mi).
Although spirals are relatively common in the Alps, particularly in Switzerland, they generally involve extensive tunnelling inside mountainsides. A masterly feature of Holmes' layout is the way in which it uses natural land contours to almost eliminate tunnels and viaducts.
Legend has it that a train driver once emergency-braked his train in the night upon mistaking the light of his last wagon on a nearby part of the spiral as the rear of a different train directly ahead of him.