
Dates 28 Feb 1942 – 1 Mar 1942 | Result Japanese victory | |
 | ||
American1 heavy cruiserAustralian1 light cruiserDutch1 destroyer 1 light carrier1 seaplane carrier5 cruisers12 destroyers1 minelayer58 troopships 1 heavy cruiser sunk1 light cruiser sunk1 destroyer sunk1071 killed675 POWs 1 minelayer sunk,4 troopships sunk or grounded,1 cruiser damaged,10 killed,37 wounded Similar World War II, Battle of the Java Sea, Battle of Java, Battle of Makassar Strait, Battle of Badung Strait | ||
Battle of sunda strait
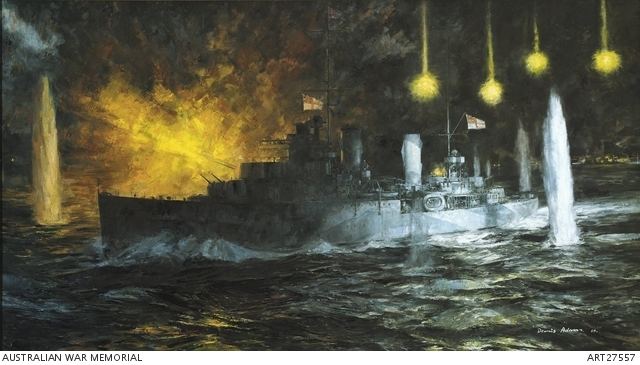
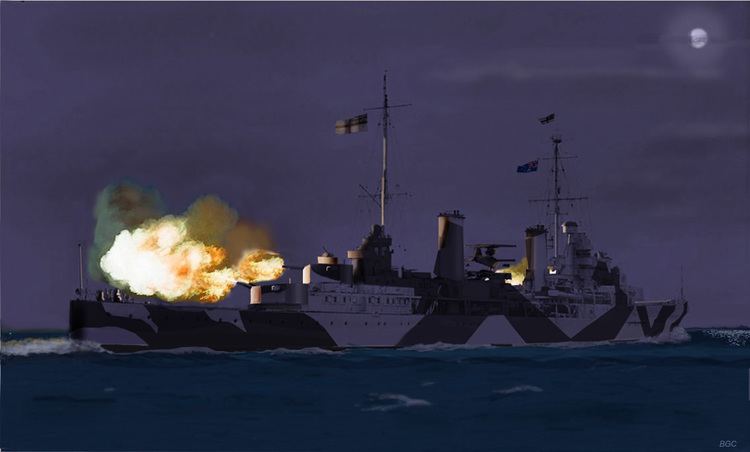
The Battle of Sunda Strait was a naval battle which occurred during World War II in the Sunda Strait between the islands of Java and Sumatra. On the night of 28 February – 1 March 1942, the Australian light cruiser HMAS Perth and the American heavy cruiser USS Houston faced a major Imperial Japanese Navy (IJN) task force. After a fierce battle of several hours duration, both Allied ships were sunk. Five Japanese ships were sunk, three of which by friendly fire.
Contents
Battle of sunda strait tale of two ships
Background
In late February 1942, Japanese amphibious forces were preparing to invade Java, in the Dutch East Indies. On 27 February, the main American-British-Dutch-Australian Command (ABDACOM) naval force, under Admiral Karel Doorman–a Dutch officer–steamed northeast from Surabaya to intercept an imperial Japanese navy invasion fleet. This part of the ABDA force consisted of two heavy cruisers, including USS Houston under the command of Captain Albert H. Rooks, three light cruisers, including HMAS Perth under Captain Hector Waller, and nine destroyers. Only six out of nine of USS Houston's 8-inch (203-millimeter) heavy guns were operational because her aft gun turret had been knocked out in an earlier Japanese air raid. The ABDA force engaged the Japanese force in the Java Sea. The Allied ships were all sunk or dispersed. Houston and Perth both retreated to Tanjung Priok, Java, the main port of Batavia, Dutch East Indies, where they arrived at 13:30 hours on 28 February.
Battle
Later on 28 February, USS Houston and HMAS Perth received orders to sail through Sunda Strait to Tjilatjap, on the south coast of Java. The Dutch destroyer HNLMS Evertsen, which intended to accompany them, was not ready and remained in Tanjung Priok. Houston and Perth left at 19:00, while Evertsen followed an hour later. Waller, who had seniority over Rooks, was in command. The only ships they expected to encounter were Australian corvettes on patrol in and around the strait.
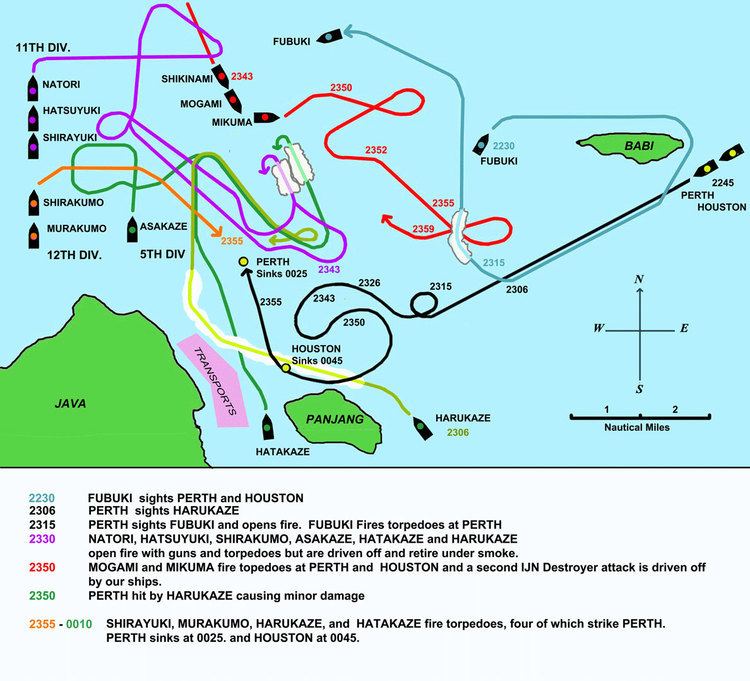
By chance, just after 22:00, the IJA 16th Army's Western Java Invasion Convoy — over 50 transports, and including the Army's commander, Lieutenant General Hitoshi Imamura — was entering Bantam Bay, near the northwest tip of Java. The Japanese troop transports were escorted by the 5th Destroyer Flotilla, led by Rear Admiral Kenzaburo Hara and the 7th Cruiser Division, under Vice Admiral Takeo Kurita. Rear Admiral Hara's light cruiser Natori—with the destroyers Harukaze, Hatakaze, Asakaze, Fubuki, Hatsuyuki, Shirayuki, Shirakumo, and Murakumo—were closest to the convoy. Flanking the bay to the north was Vice Admiral Kurita's cruisers Mogami and Mikuma — and the destroyer Shikinami.
Slightly further north, though not involved in the action, was the aircraft carrier Ryūjō, with Kurita's Suzuya and Kumano — along with the seaplane carrier Chiyoda, and the destroyers Isonami, Shikinami and Uranami.
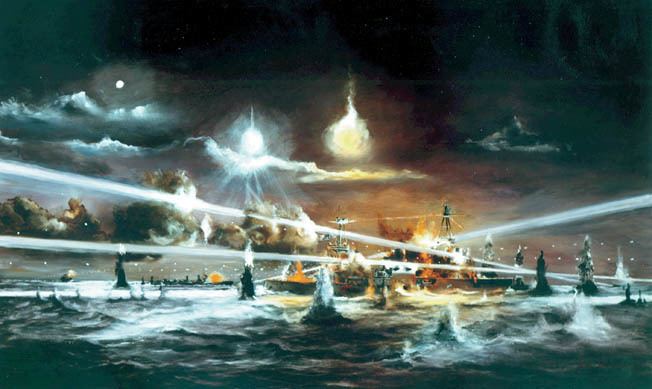
Some time around 23:00, the Allied ships were sighted by the patrolling Fubuki, which followed them surreptitiously. At 23:06, when they were about halfway across the mouth of Bantam Bay, Perth sighted a ship about 5 mi (4.3 nmi; 8.0 km) ahead, near Saint Nicolaas Point. It was thought at first that the ship was an Australian corvette, but when challenged, she made an unintelligible reply, with a lamp which was the wrong color, fired her nine Long Lance (Type 93) torpedoes from about 3,000 yards (2,700 m) and then turned away, making smoke. The ship was soon identified as a Japanese destroyer (probably Harukaze). Waller reported the contact and ordered his forward turrets to open fire.
In a ferocious night action that ended after midnight, the two Allied cruisers were sunk. Two Japanese transports and a minesweeper were sunk by friendly torpedoes. Two other transports — one of which was Ryujo Maru, on which Lt. Gen. Hitoshi Imamura was aboard — were also sunk but later refloated. After Imamura's ship was fatally hit and sank, he had to jump overboard. However a small boat rescued and brought him ashore.
Aftermath
696 men on board the Houston were killed, while 368 others were saved. Perth lost 375 men, with 307 others saved. The captains of both cruisers were also killed. Rooks was posthumously awarded the Medal of Honor for his actions.
The cruiser Mikuma lost six men and eleven wounded as a result of damage caused by Houston. The destroyer Shirayuki suffered a direct shell hit to her bridge, killing one crewman and injuring eleven others, while Harukaze suffered hits to her bridge, engine room and rudder, killing three crewmen and over 15 injured.
Both Houston and Perth were still engaging the Japanese convoy by the time the Dutch destroyer HNLMS Evertsen arrived. She was trying to catch up with the two cruisers when she saw tracers and intense shellfire ahead. In an attempt to avoid the battle, Evertsen sailed around them and through Sunda Strait. All went well until she encountered the destroyers Murakumo and Shirakumo protecting the southern flank of Bantam Bay, which immediately fired on her. Evertsen altered course and managed to escape, but after re-entering Sunda Strait, she encountered them again. She again managed to escape under a smokescreen, but by then her stern was on fire. Still taking fire from the destroyers, Evertsen attempted to beach on a coastal reef. Firing all her torpedoes, the crew escaped before the fire reached the aft magazine, causing an explosion which blew off most of the stern. The majority of Evertsen's crew was taken prisoner on 9–10 March 1942 and were held by the Japanese for three and a half years.