
73 warships and some fireships, though only part was able to participate 37 warships | Date 30 November 1652 | |
 | ||
1 ship lost in accidental explosion 5 ships lost2 captured,3 sunk Similar Battle of Goodwin Sands, Battle of the Gabbard, First Anglo‑Dutch War, Battle of Scheveningen, Battle of Leghorn | ||
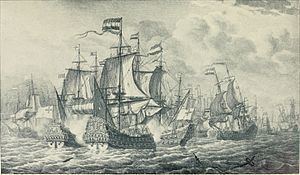
Battle of dungeness
The naval Battle of Dungeness took place on 30 November 1652 (10 December Gregorian calendar), during the First Anglo-Dutch War near the cape of Dungeness in Kent.
Contents
- Battle of dungeness
- Background
- Battle
- Aftermath
- Tromp squadron
- De Ruyter squadron
- Evertsen squadron
- Florisse squadron
- References
Background
In September 1652 the government of the Commonwealth of England, the Council of State, mistakenly believing that the United Provinces after their defeat at the Battle of the Kentish Knock would desist from bringing out a fleet so late in the season, sent away ships to the Mediterranean and the Baltic. At the same time the largest English vessels remained in repair and active ships were undermanned as sailors deserted or rioted because their wages were in arrears. This left the English weakened and badly outnumbered in home waters. Meanwhile, the Dutch were making every effort to reinforce their fleet. Dutch trade interests demanded that their navy would make a final effort to convoy merchantmen to the south.
Battle
On 21 November 1652 Old Style, 1 December New Style, Lieutenant-Admiral Maarten Tromp, again (unofficial) supreme commander after his successor Vice-Admiral Witte de With had suffered a breakdown because of his defeat at the Battle of the Kentish Knock, set sail from the naval port of Hellevoetsluis with 88 men of war and five fireships, escorting a vast convoy of 270 merchantmen bound for France, the Mediterranean and the Indies. At first, unfavourable southwestern gales forced him to return but on 23 November he again sailed south. With the convoy, accompanied by sixteen warships, safely delivered through the Straits of Dover, Tromp turned to the west in search of the English, and on 29 November 1652 he discovered the English fleet of 42 capital ships and ten smaller vessels anchored in the Downs, between the landheads of North Foreland and South Foreland, commanded by General at Sea Robert Blake. After a council of war in which it was decided to avoid battle, the English promptly left their anchorage, sailing south. Blake may have not realized how large the Dutch fleet was, or he may have feared to become trapped like the Spanish had some years earlier in the Battle of the Downs. The wind was now strong from the northwest, so the English could not return to the Downs in any case, having to settle for Dover. The English fleet swiftly rounded South Foreland while the Dutch were unable to reach them, both fleets anchoring in the evening at about five miles distance. During the night a storm dispersed some Dutch vessels. Next morning, at noon the two fleets began to move southwest, with the English hugging the coast and the Dutch keeping some distance. The forces were separated by the Rip-Raps and the Varne Shoal and therefore unable to engage. Ultimately the curve of the shoreline, the cape of Dungeness or the "Hook of the Shingles" jutting out, forced the English to turn on a southerly course. Between the Varne Shoal and Dungeness a narrow exit exists. Blake had hoped to escape through it but when he arrived already about seventeen Dutch ships were waiting for him. Nevertheless, he continued his manoeuvre. At about 15:00, the leading ships of both fleets met in what a contemporary account called a "bounteous rhetoric of powder and bullet".
Blake's Triumph was the first larger ship to sail through the exit. At that moment Tromp's Brederode arrived and the Dutch commander immediately hoisted the red "bloodflag" as a sign to attack. Blake, noticing this, tacked to cross the bow of the Brederode, giving his opponent a broadside. In response, Tromp also tacked and fired a salvo. The next English ship, the Garland, then moved between the Triumph and the Brederode in an attempt to cross the latter's bow also. This failed however, the Garland ramming the bow of the Brederode at starboard with such force that both ships remained entangled. The snout and bowsprit of the Brederode broke off. The larger crew of the Brederode swiftly boarded the Garland. Tromp encouraged his men by promising a reward of five hundred guilders to the first who would strike the English flag. One sailor climbed into the main mast of the Garland and replaced the St George's Cross with the Prince's Flag. In despair, captain Richard Batten blew up his own upper deck to drive away the Dutch. Meanwhile, the third English ship to arrive, the Anthony Bonaventure, grappled the port of the Brederode. Covering the deck of the Dutch ship with canister shot, it soon forced its crew below deck. Noticing the plight of his commander, Vice-Admiral Johan Evertsen in turn boarded the port of the Anthony Bonaventure with his Hollandia, so that four ships were now attached. In ferocious fighting his men, losing sixty, killed the entire crew of the Anthony Bonaventure, including Captain Walter Hoxton. When Tromp's secretary, standing next to him, was killed by a musket ball, he exhorted the combined crews of the Brederode and the Hollandia to assault the Garland, exclaiming "Children, things cannot go on this way. It's them or us!". The Garland was taken, with sixty killed out of a crew of hundred fifty, including Captain Batten. At this point the Garland was in a bad condition, her rudder largely having been shot away.
Blake tried to assist the Garland and the Anthony Bonaventure but was constantly attacked by Dutch flagships such as the Princes Louise of Johan de Liefde and the Monnickendam of Pieter Florisse. The Triumph nearly avoided being grappled at both sides, by the Princes Louise and the Gulden Beer of Captain Jan de Haes. Blake received little support from the remainder of the English fleet. When the Happy Entrance entered the channel, she was at once assaulted and only with difficulty managed to extract herself. The other English ships began to understand the tactical situation: the exit functioned as a bottle neck and trying to force it would only allow the Dutch to overpower the English ships one by one. On the other hand, most Dutch ships did not engage either. Annoyed, Commodore Michiel de Ruyter on the Witte Lam entered the exit in the opposite direction to attack the mass of the English ships but no one followed him and he was forced to withdraw. He complained in his journal: "If we had any help, yea of but ten or twelve ships, we would have beaten the entire fleet". Despite the tactical difficulties, it was unacceptable to leave Blake to his fate. The two most heavily armed English vessels apart from the Triumph, the Vanguard and the Victory, used their superior firepower to break the Dutch opposition and allowed Blake to retreat and join the English main force. The Triumph had lost her fore-topmast and Blake had been wounded.
Around 17:00, the onset of darkness ended the battle. A large part of the Dutch fleet had not even arrived yet. The English fleet by nightfall had lost five ships. These included the captured Garland and Anthony Bonaventure that would be taken into Dutch service as the Rozenkrans and the Bonaventura. Two smaller vessels were burnt, one of them perhaps the light frigate Acorn, and one sunk. In the evening, the Dutch lost the Schiedam, also known as the Gelderland because the States of Gueldres had paid for her, through fire and subsequent explosion. Captain Dirk Juinbol died from his wounds the next day. Blake that night retreated under cover of darkness to his anchorage in the Downs. The Dutch did not follow but used this time to repair the ships, especially the Brederode. The next morning the Dutch intercepted a group of three merchantmen sailing from the west. Their guard ship, the Merlin, managed to escape, but they themselves were taken and their cargo of figs and lemons were distributed among the Dutch crews. Tromp could not be satisfied with the result however as the Dutch had missed an opportunity to annihilate the English. On 1 December, he pursued Blake who, however, had already rounded South Foreland again. The wind turned east, which allowed Blake to quickly reach the Thames but slowed the Dutch. A group of English ships was encountered, that had been sent to reinforce Blake but had sailed past him in the darkness. Two new frigates, the Ruby and the Sapphire, managed to escape, but the Hercules, an armed merchantman, was run ashore by her captain, Zachary Browne. Most of the crew fled inland and the Hercules, and Browne, were captured by the Haes in 't Veld of Bastiaan Centsen who managed to refloat the vessel.
Returning to the Strait of Dover, Tromp allowed his merchant convoy to split up, each group of merchantmen continuing its way towards their individual destination together with their protecting warships. Tromp considered to attack Blake in the Medway but despite a reward offered of fifty Flemish pounds, in the entire Dutch fleet not a single pilot could be found who dared to navigate these dangerous waters. Only in 1667, De Ruyter managed to execute such an attack, in the Raid on the Medway.
Aftermath
The battle resulted in several reforms in the English Fleet. Part of Blake's force consisted of impressed merchant vessels that retained their civilian captains/owners. Many of them refused to participate in the battle. Some naval captains insisted on their traditional right to enter and leave the battle at times of their choosing, and to leave formation in order to secure any prize. Blake threatened to resign if something was not done. The Lords Commissioners of the Admiralty responded by:
The victory gave the Dutch temporary control of the English Channel and so control of merchant shipping. A legend says that Tromp attached a broom to his mast as a sign that he had swept the sea clean of his enemies, but in his book The Command of the Ocean, N.A.M. Roger doubts the legend as such a boasting action would have been out of character for Tromp. Additionally, at the time, a broom attached to a mast was the way of showing that a ship was for sale.
Also Dutch contemporaneous sources make no mention of it. The battle not only showed the folly of dividing forces while the Dutch still possessed a large fleet in home waters, but exposed "much baseness of spirit, not among the merchantmen only, but many of the state's ships". It seemed that the captains of hired merchant ships were reluctant to risk their vessels in combat, while the state's ships lacked the men to sail and fight them.