Sir Henry Bartle Freres (John Mills) vastly outnumbered garrison makes a stand against natives at Isandhlwana in 1879.
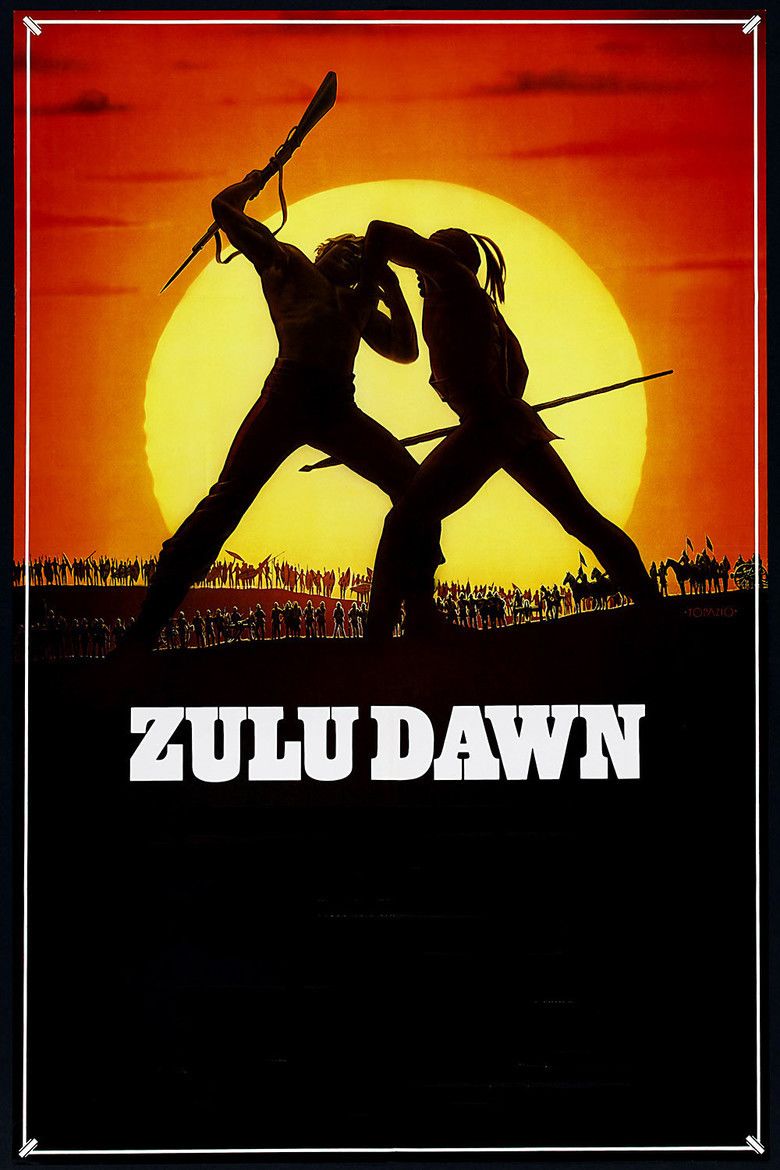
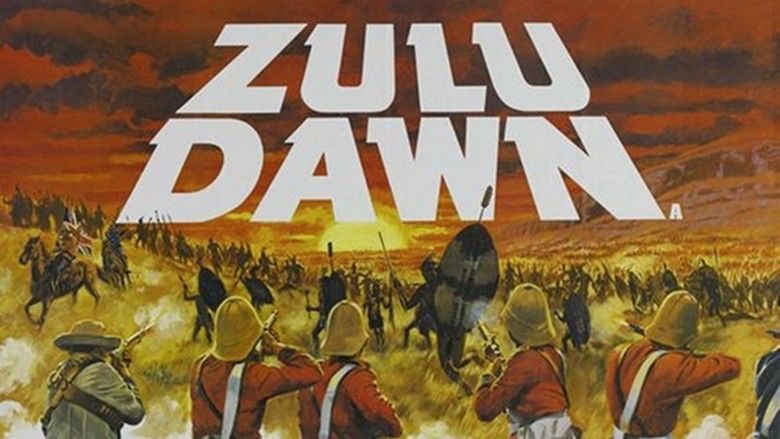
Zulu Dawn is a 1979 war film about the historical Battle of Isandlwana between British and Zulu forces in 1879 in South Africa. The screenplay was by Cy Endfield, from his book, and Anthony Story. The film was directed by Douglas Hickox. The score was composed by Elmer Bernstein.
Zulu Dawn is a prequel to Zulu, released in 1964, which depicts the historical Battle of Rorkes Drift later the same day, and was co-written and directed by Cy Endfield.
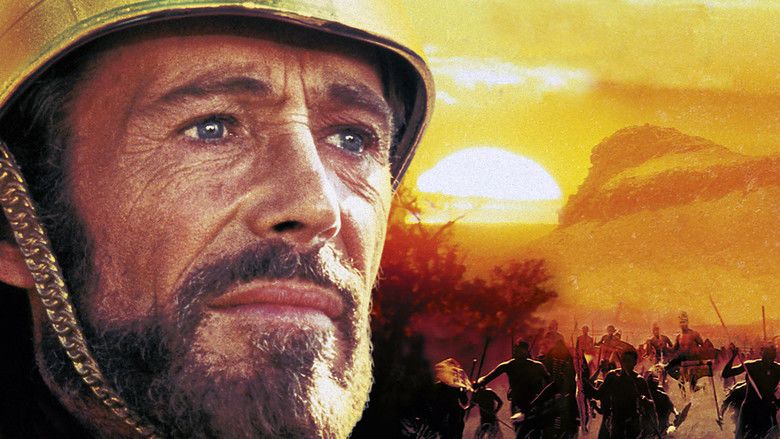
In 1879, the British suffer a great loss at the Battle of Isandlwana due to incompetent leadership. Cy Endfield co-wrote the epic prequel Zulu Dawn 15 years after his enormously popular Zulu. Set in 1879, this film depicts the catastrophic Battle of Isandhlwana, which remains the worst defeat of the British army by natives, with the British contingent outnumbered 16-to-1 by the Zulu tribesmen. The film's opinion of events is made immediately clear in its title sequence: ebullient African village life presided over by King Cetshwayo is contrasted with aristocratic artifice under the arrogant eye of General Lord Chelmsford (Peter O'Toole). Chelmsford is at the heart of all that goes wrong, initiating the catastrophic battle with an ultimatum made seemingly for the sake of giving his troops something to do. His detached manner leads to one mistake after another.
The film is set in British South Africa, in the province of Natal, in January 1879. The first act of the film revolves around the administrators and officials of Cape Colony, notably the supremely arrogant Lord Chelmsford and the scheming Sir Henry Bartle Frere, who both wish to crush the neighbouring Zulu Empire, which is perceived as a threat to Cape Colonys emerging industrial economy. Bartle Frere issues an impossible ultimatum to the Zulu king, Cetshwayo, demanding that he dissolve the Zulu Empire. Cetshwayo refuses, providing Cape Colony with a pretext to invade Zululand. Despite objections from leading members of Cape Colonys high society and from Great Britain itself, Bartle Frere authorises Lord Chelmsford to lead a British invasion force into Zululand.
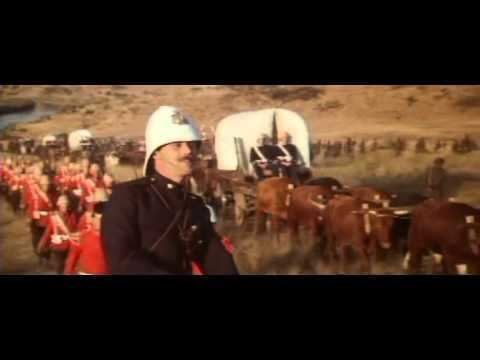
The rest of the film focuses on the British invasion of Zululand and the lead-up to the Battle of Isandlwana. The invading British army, laden with an immense network of supply wagons, invades Zululand and marches in the direction of Ulundi, the Zulu capital. British forces, eager to fight a large battle in which they can unleash their cutting-edge military technology against the vast Zulu army, become increasingly frustrated as the main Zulu army refuses to attack the British, and fighting is restricted to a few small skirmishes between British and Zulu scouts. Concerned that their supply lines are becoming overstretched and that the main Zulu army is still at large, British troops begin torturing captive Zulu warriors in an effort to learn the location and tactics of the Zulu army. Halfway to Ulundi, Chelmsford halts his army at the base of Mount Isandhlwana, ignoring the advice of Boer attendants to entrench the camp and laager the supply wagons, leaving the camp dangerously exposed. During the night, Colonel Durnford and an escort of fifty mounted Basutos approach the camp. Lord Chelmsford then orders Durnford to return to his unit, bringing them to the camp immediately to reinforce Colonel Pulleine. Lt. Vereker should join Durnford as aide-de-camp.
Reacting to false intelligence, Chelmsford leads half of the British army, including the best infantry, cavalry and artillery units, on a wild goose chase far from the camp, in pursuit of a phantom Zulu army. On the day of battle, Durnford and his troops arrive at 11:00 a.m. at the camp at Isandlwana. Meanwhile, the Zulu captives escape from their torturers and regroup with the Zulu army, informing them of the British armys direction and strength. After having lunch with Colonel Pulleine and Lt. Vereker, Durnford quickly decides to send Vereker to scout the hills. Durnford then decides to take his own command out from the camp too, and scout the iNyoni heights.
The entire Zulu army is later discovered by men of Lt. Verekers troop of scouts. Chasing a number of Zulu herdsmen trying to hurry away their cattle, they discover the main Zulu enemy force of thousands at the bottom of a valley. Lt. Vereker sends Lt. Raw to warn the camp that it is about to be attacked.
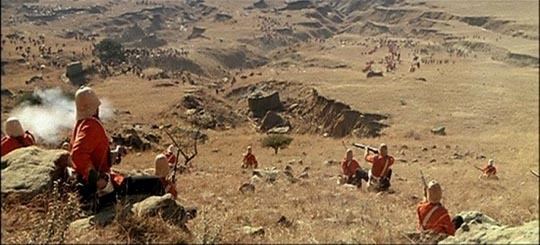
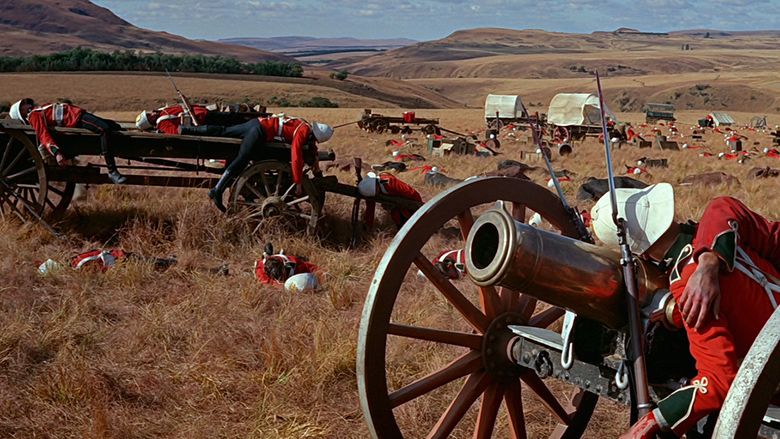
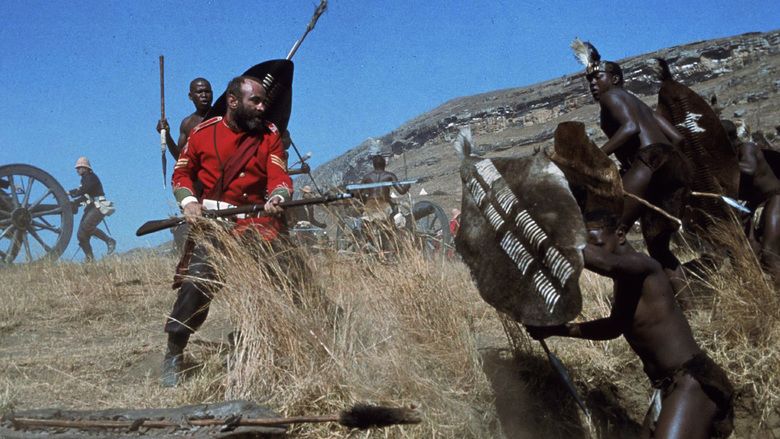
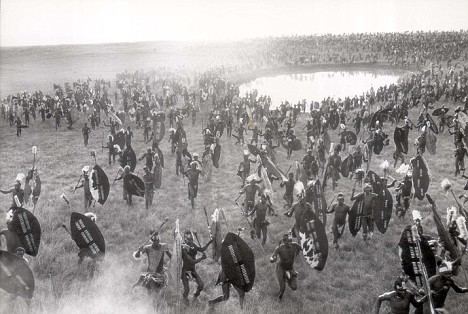
As Zulu impis descend upon the camp, Durnfords cavalry retreat to a donga in an effort to hold back the Zulu advance. Forced back, the British take heavy casualties, including the battery of Congreve rockets, which is overrun by the Zulus. Initially, the British infantry succeed in defending the camp, and Zulu forces retreat under a hail of artillery fire. British units defending the camp are now becoming dangerously spread-out, and are oblivious to Zulu forces moving round the sides of the mountain in an encircling move. As British infantrymen begin to run out of ammunition due to the Quartermasters incompetent distribution and the British cavalry are driven back towards the camp, Zulu warriors charge the British troops en masse, sustaining horrific casualties, but succeed in breaking the British lines.

As British troops break and flee towards the camp, the battle breaks down into hand-to-hand fighting between British soldiers and Zulu warriors, amongst the debris of tents, fallen soldiers and supply wagons. Overwhelmed by the sheer number of Zulu warriors, British soldiers and their Afrikaans allies are slaughtered in the camp, some being cut down as they attempt to flee towards Natal. During the last minutes of the battle, the camps commander, Colonel Pulleine, entrusts the Queens Colours of the 2nd battalion, 24th Regiment of Foot to two junior officers, Lts. Melvill and Coghill, who attempt to carry them to safety in Natal, passing gruesome scenes as Zulu warriors hunt down British and African infantrymen attempting to flee across the river.
While crossing the Buffalo River, the three lieutenants are cut down by Zulus and the Colours (a Union Flag embroidered with the Regiments insignia) are captured. Lying wounded, perhaps mortally, Vereker shoots and kills the Zulu wielding the Colours, and the Colours fall gracefully into the river, where they are carried out of reach.
In the evening, Chelmsford and the rest of the British army return to Isandlwana, to be greeted by the sight of their slaughtered comrades, and the news that a mass Zulu army has invaded Natal and laid siege to Rorkes Drift. The film ends with Zulu warriors in a silhouetted victory procession, dragging captured British artillery back to Ulundi.
Peter OToole: Lord Chelmsford. The arrogant commander of British forces in South Africa, Chelmsford is eager to advance his military career by crushing neighbouring Zululand, believing that "for the savage as for the child, chastisement is sometimes a blessing". During the invasion, Chelmsford refuses to listen to advice from his British and Boer advisers, and from the comfort of his tent and personal coach, authorises his troops to torture Zulu captives. On the day of the battle, Chelmsford commits a cardinal error in splitting his forces. While the troops at Isandlwana fight for their lives, Chelmsford and his equally arrogant officers, a few miles away, enjoy a silver-service luncheon. Chelmsford is last seen arriving at the site of the battle several hours later, mortified by the defeat of his soldiers, absorbing the news that the victorious Zulu army has invaded Natal. Chelmsfords arrogance was mixed with incompetence as he left unclear instructions to those left behind at Isandlwana including which officer was in charge, Durnford or Pulleine. Chelmsford would later lay the blame for the disaster on Colonel Durnford.Burt Lancaster: Colonel Durnford. Commander of a large force of the Natal Native Contingent (NNC), Britains African allies, Durnford is a humane officer who expresses concern for the lives and welfare of his African troops. When war breaks out, Durnford, much to his chagrin, is ordered to remain in Natal and defend the border rather than accompany the invasion force. His troops are ultimately called to reinforce the invasion army, and on the day of battle, Durnford and his African cavalrymen are driven into the camp at Isandlwana. As the British forces break apart, the one-armed Durnford becomes trapped in the camp. Hoping to save his men, Durnford orders his African cavalrymen to retreat. Remaining on foot at the battlefield, Durnford is killed alongside his infantrymen. Durnford would later be painted by Chelmsford as the scape-goat for the disaster.Denholm Elliott: Colonel Pulleine. A mild-mannered man, Pulleine is a military bureaucrat who accompanies the army into Zululand, and finds himself left in command of the camp at Isandlwana after Chelmsford leaves on a sortie. News of the approaching Zulu army unnerves Pulleine, and his overstretched troops are unable to defend the camp. After having entrusted the Union Flag to Lts. Melvill and Coghill, Pulleine returns to his tent to pen a last letter to his wife. He is discovered by an escaped Zulu prisoner and, unwilling to shoot the young soldier, the elderly Pulleine is killed in his tent.James Sebastian Faulkner: Lieutenant Melvill. Portrayed as an arrogant and overconfident man, when a lone Zulu warrior calls from the mountain asking why British forces are invading, Melvill replies, "we come here by the order of the great Queen Victoria, Queen of all Africa!" Towards the end of the battle, Melvill carries the Queens Colours back towards Natal, bypassing British infantrymen being killed as they flee towards the river. Melvill reaches the river border between Zululand and Natal, but is speared by Zulu warriors while defending the flag.Christopher Cazenove: Lieutenant Coghill. A polite and humorous young officer, Coghill is temporarily attached to Colonel Pulleines staff, due to an injured leg which requires him to ride on horseback. Coghill has a close friendship with Lt. Melvill, and during the invasion he expresses dissatisfaction at Chelmsfords strategy. Towards the end of the battle, Coghill accompanies Melvill in his attempt to escort the Queens Colours back to Natal. When Melvill nearly drowns while trying to cross the Buffalo River, Coghill turns to help him, but they are ambushed by Zulu warriors. Coghill tries to defend the flag with his revolver, but is killed.Simon Ward: Lt. William Vereker. A young officer who has recently attached to Durnfords command, Vereker is a light-hearted cavalry officer eager to see war. Verekers enthusiasm, though, evaporates as he sees Zulu warriors tortured and slain by British troops. Vereker and his men discover the main Zulu army on the morning of the battle, and as British lines collapse, Vereker accompanies Lts. Melvill and Coghill in an effort to return the Queens Colours to Natal. Zulu warriors attack and kill Melvill and Coghill, and seize the Colours. Vereker, despite his injuries, takes aim with his rifle and shoots the Zulu wielding the Colours, ensuring that they fall into the Buffalo River, where they float downstream. Verekers fate remains unknown.Bob Hoskins: Colour Sergeant-Major Williams. The loud, aggressive Williams, a high-ranking NCO, is both feared and respected by his troops, but displays genuine concern, taking the young Private Williams under his wing. During the battle, Williams loses many of his infantrymen during hand-to-hand fighting, and is injured while defending a group of unarmed artillerymen. Williams is stabbed in the back while attempting to rescue Private Williams, and having killed several Zulu soldiers with his bayonet, dies amid a large wave of Zulus.Peter Vaughan: Quartermaster Bloomfield. An elderly and jovial war veteran who claims to have been the bugler for the Duke of Wellington, Bloomfield is a military administrator responsible for overseeing the invasion forces supply network. Bloomfield takes a young bugler, Boy Pullen, under his wing, but his compassion does not extend to the NNCs black soldiers, who he sees as little more than savage animals. During the battle, Bloomfield refuses to bypass regulations requiring that ammunition be dispensed in small, properly recorded quantities, causing an ammunition shortage that forces British troops to retreat. Bloomfield is injured when his ammunition wagon explodes, which kills Boy Pullen, and is himself killed when a Zulu warrior impales him from behind.Michael Jayston: Colonel Crealock. An officer of the Royal Artillery and lickspittle to his commander, Colonel Crealock acts as Lord Chelmsfords secretary, constantly expressing his agreement with Chelmsfords decisions. He accompanies Chelmsfords expedition away from Isandhlwana, and is seen idly sketching the landscape. When questioned by Newman on the logic of splitting the British army, Crealock acidly replies that the Zulus primitive weaponry does not pose any real threat. When Lieutenant Harford relays news from Isandhlwana with an urgent request for reinforcements, Crealock lectures Harford on military etiquette, and does nothing to facilitate the request. Crealock is last seen with Chelmsford after returning to the devastated camp, bringing news of an ongoing battle at Rorkes Drift and a Zulu invasion of Natal.Ronald Pickup: Lieutenant Harford. A well-meaning officer of the NNC, Harford distinguishes himself from his colleagues through his concern for his African soldiers, and is appalled by his superiors lack of concern for the lives of native workers, and by Chelmsfords casual attitude to the torture of Zulu captives. On the day of the battle, Harford accompanies Chelmsfords column. During the early stages of the battle, a rider dispatched by Colonel Pulleine to catch up with Chelmsfords army brings an urgent request for reinforcements. His message is ignored, and Harford is denied permission to return to Isandhlwana. He is last seen in the evening, weeping at the bodies of young soldiers.Ronald Lacey: Norris "Noggs" Newman. A war correspondent for The Standard, Norris-Newman accompanies the army into Zululand to report on the war. Newman is deeply critical of Chelmsford, frequently pointing out his tactical errors, making no effort to conceal his contempt for the general. Newman appears to have much more background knowledge on the Zulus than the officers, and expresses sympathy for the Zulus who stand little chance against Western warfare. Newman accompanies Chelmsfords expedition and is last seen with Chelmsford, staring at the devastation of the battlefield.John Mills: Sir Henry Bartle Frere. The British High Commissioner for South Africa who provokes the war by issuing King Cetshwayo with an impossible ultimatum. Viewing the Zulus as savage barbarians, Bartle Frere believes that the war will provide "a final solution to the Zulu problem." Frere is last seen on the night of the British invasion, and is not seen again after this.Simon Sabela: King Cetshwayo. King of Zululand, Cetshwayo is depicted as a peaceful and effective ruler, eager to avoid war but unwilling to compromise Zululands security by agreeing to Bartle Freres ultimatum. Cetshwayo is concerned that mobilising his armies will leave a chronic labour shortage, and is eager to defeat the British army in time for his soldiers to return and gather the harvest. Cetshwayo is last seen in his kraal at Ulundi, reluctantly announcing a state of war between Zululand and Cape Colony.Ken Gampu: Mantshonga. A Zulu regarded as a traitor by Cetshwayo because of his support for a rival claimant to the Zulu throne, Mantshonga delivers him the British ultimatum to Cetshwayo and returns his response.Abe Temba: Uhama. A leading general and strongman in the Zulu army, Uhama masterminds various schemes to confuse British forces, using scouts to gain intelligence on the British army, and small raiding parties to confuse their scouts on the whereabouts of Zulu impis. Uhama realises he must overwhelm the British while they are exposed and vulnerable; and that an open battle would result in a crushing Zulu defeat. He keeps his impis hidden, allowing the invaders to progress deep into Zululand, waiting for them to commit an error that will give the impis the opportunity to overwhelm the British before they have time to commit their technology to the battle. While chasing a Boer scout, Uhama instructs three of his warriors to allow themselves to be captured by the British, who eventually escape and advise Uhama on British weaknesses. In contrast to the British commanders, Uhama displays immense bravery, and is last seen leading his warriors into the debacle of the British camp, where he is shot and presumably killed.Gilbert Tiabane: Bayele. A young warrior in the Zulu army, Bayele leads several scouting missions to gain intelligence on British forces. Under orders from Uhama, Bayele allows himself to be captured by cavalrymen of the NNC, and with two other warriors, is taken to the camp at Isandhlwana. While lashed to wagon wheels, Bayele and his two comrades are tortured but only reveal false information. Bayele later uses a distraction in the camp to kill the guard and release his two comrades; the three escape to rejoin the Zulu army. Bayele takes part in the assault on the camp, and by chance finds himself face-to-face with Colonel Pulleine in the command tent. Pulleine, recognising Bayele as the tortured prisoner, is unable to shoot Bayele, and Bayele seizes the opportunity to kill him.Zulu Dawn and Zulu are part of the same movie series. The Charge of the Light Brigade (1968). Peter OToole appears in Zulu Dawn and The Lion in Winter. Khartoum (1966). Glory (1989).
Despite having a large budget and being designed to complement the hugely successful film Zulu, the film was not well received and did not fare particularly well at the box office.