
 | ||
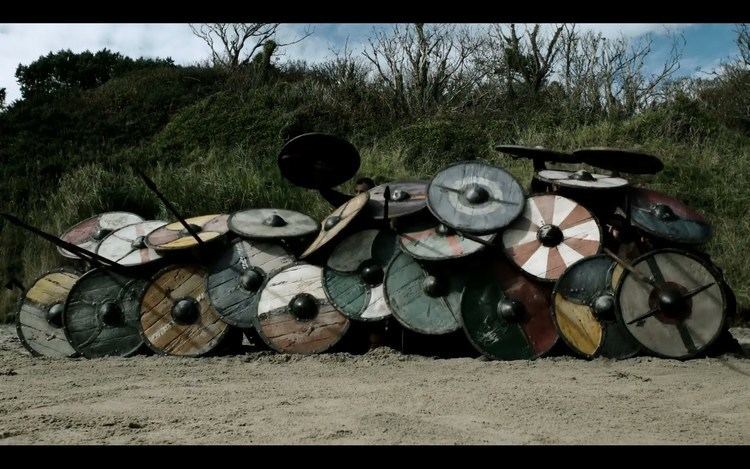
vikings shield wall battle hd
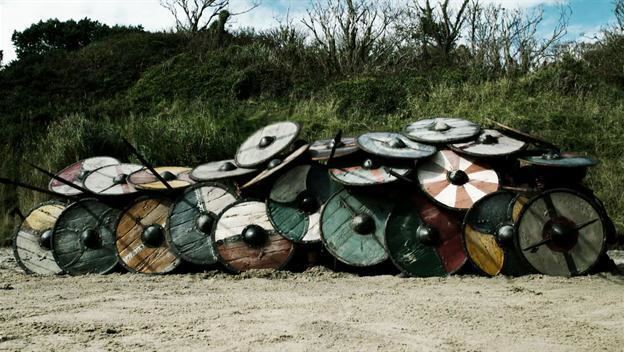
The formation of a shield wall (Scildweall or Bordweall in Old English, Skjaldborg in Old Norse) is a military tactic that was common in many cultures in the Pre-Early Modern warfare age. There were many slight variations of this tactic among these cultures, but in general, a shield wall was a "wall of shields" formed by soldiers standing in formation shoulder to shoulder, holding their shields so that they abut or overlap. Each soldier benefits from the protection of their neighbours' shields as well as their own.
Contents
- vikings shield wall battle hd
- Summer skirmish shield wall demo
- Ancient times
- Tactics
- Examples
- Decline
- Use in modern times
- References
Summer skirmish shield wall demo
Ancient times
This tactic was known to be used by many ancient armies including the Persian Sparabara, Greek hoplite, Macedonian phalanx, and Roman legion, though its origin and spread is unknown. It may have developed independently more than once.
Although little is recorded about their military tactics, the Stele of the Vultures depicts soldiers in a shield wall formation during the third millennium BC.
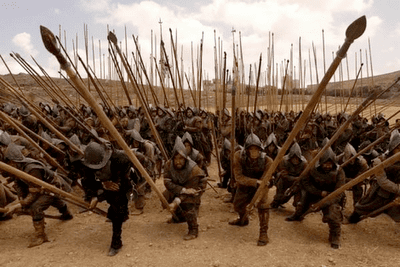
By the seventh century BC, shield walls in ancient Greece are well-documented. The soldiers in these shield wall formations were called hoplites, so named for their heavy weaponry (hopla, "ὅπλα"). These were three-foot shields made from wood and covered in metal. Instead of fighting individual battles in large skirmishes, hoplites fought as cohesive units in this tight formation with their shields pushing forward against the man in front (to use weight of numbers). The left half of the shield was designed to cover the unprotected right side of the hoplite next to them. The worst, or newest, fighters would be placed in the middle front of the formation to provide both physical and psychological security.
In a phalanx, the man at the right hand of each warrior had an important role; he covered the right side of the warrior next to him with his shield. This made it so that all the shields overlap each other and thus formed a solid battle line. The second row's purpose was to kill the soldiers of the first line of an enemy shield wall, and thus break the line. All the other rows were weight for the pushing match that always occurred when each side tried to break the other's wall. When a wall was broken, the battle turned into a single-combat melee in which the side whose wall collapsed had a serious disadvantage.
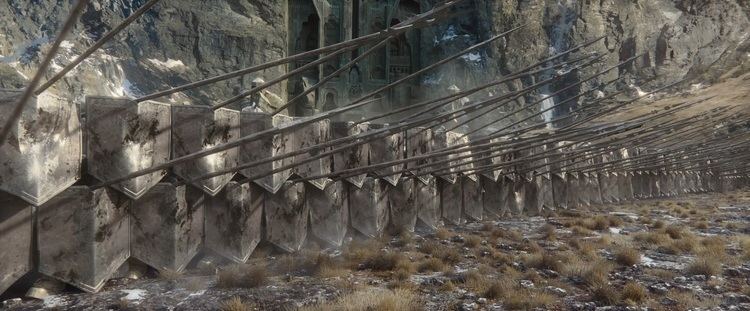
The Roman scutum was a large shield designed to fit with others to form a shield wall, though not overlap. Roman legions used an extreme type of shield wall called a testudo formation that covered front, sides and above. In this formation, the outside ranks formed a dense vertical shield wall and inside ranks held shields over their heads, thus forming a tortoise-like defense, well-protected from missile weapons. Although highly effective against missiles, this formation was slow, and vulnerable to being isolated and surrounded by swarms of enemy soldiers. Caesar, in De Bello Gallico, describes the Germans as fighting in a tight phalanx-like formation with long spears jutting out over their shields.
In the late Roman and Byzantine armies, similar formations of locked shields and projecting spears were called fulcum (φοῦλκον, phoulkon in Greek), and were first described in the late 6th-century Strategikon. Roman legions were typically well-trained, and often used short stabbing-swords (such as the Gladius) in the close-quarters combat that inevitably resulted when their shield-walls contacted the enemy. As Auxiliaries were often less well-armed, a shield-wall with spearmen was commonly used to provide a better defence.
Tactics
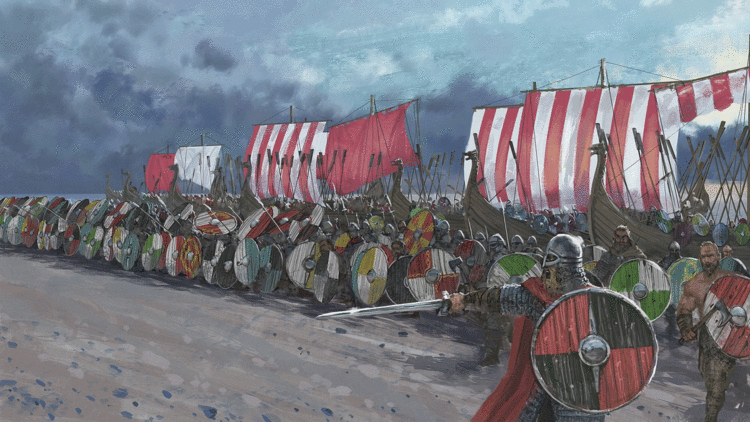
The shield-wall was commonly used in many parts of Northern Europe, such as England and Scandinavia.
In the battles between the Anglo-Saxons and the Danes in England, most of the Saxon army would have consisted of the inexperienced Fyrd — a militia composed of middle class freemen. The shield-wall tactic suited such soldiers, as it did not require extraordinary skill, being essentially a shoving and fencing match with weapons.
The first three ranks of the main wall would have been made up of select warriors, such as Huscarls and Thegns, who carried heavier weapons and consistently wore armour. There would also have been nobles, such as Thegns and Earls, who would have had their own armoured retainers and bodyguards. However, the vast majority of opponents in such battles were armed with spears, which they used against the unprotected legs or faces of their opponents. Often, soldiers would use their weapons to support each other by stabbing and slashing to the left or the right, rather than just ahead. Short weapons, such as the ubiquitous seax, could also be used in the tight quarters of the wall. Limited use of archery and thrown missile weapons occurred in opening stages of shield-wall battles, but were rarely decisive to the outcome.
The drawback of the shield-wall tactic was that, once breached, the whole affair tended to fall apart rather quickly. Relatively lightly trained fyrdmen gained morale from being shoulder-to-shoulder with their comrades, but often fled once this was compromised. Once the wall was breached, it could prove difficult or impossible to re-establish a defensive line, and panic might well set in among the defenders.
Although the importance of cavalry in the Battle of Hastings portended the end of the shield-wall tactic, massed shield-walls would continue to be employed right up to the end of the 12th century, especially in areas that were unsuitable for large scale mounted warfare, such as Scandinavia, the Swiss Alps and Scotland.
Examples
The tactic was used at the Battle of Stamford Bridge, where the relatively well-armed Saxon army hit the Viking army of King Harald Sigurdsson of Norway unaware. The Vikings were not wearing as much armour, having left their mail behind on the ships and wearing only their helmets, and after a bloody shield-wall-versus-shield-wall battle, fled in panic. Both sides lost 5-6000 each, but the numerical superiority of the English won the battle.
Both sides at the Battle of Hastings are depicted using the tactic in the Bayeux Tapestry, although the battle was ultimately won through a combination of Norman mounted cavalry and the impetuousness of less experienced Saxon warriors.
Decline
The shield-wall as a tactic has declined and has been resurrected a number of times. For example, in the Greek and Macedonian phalanxes, as the Dory spear gave way to the sarissa, it became impossible to carry a large shield and so it was abandoned (smaller shields were used).
Likewise, in the Late Middle Ages, the shield was abandoned in favour of polearms carried with both hands (and often partial plate armor), giving rise to the pike square tactics.
In the revival of military thinking and tactics that was a part of the Renaissance, military theorists such as Niccolò Machiavelli in his The Art of War advocated a revival of the Roman legion and Sword and shieldmen. But, as in the phalanxes before, well-drilled pikemen displaced the shield-carrying spearmen.
The pike square remained in use on the European battlefields of the 16th and 17th centuries, but with the increasing importance of the handgun, it was replaced by the line, column and square formations in the 18th century.
Use in modern times
Although largely obsolete as a military tactic due to firearms, a wall of riot shields remains a common formation for riot police worldwide where firearms are not expected, but protection is required against large groups using improvised weapons, punches and kicks - and from thrown objects, such as bricks, bottles, Molotov cocktails, or other items that pose a threat.