
Allegiance United Kingdom Service/branch British Army Role Military Commander | Name Harold Walker Years of service 1884–1928 Rank Lieutenant general | |
 | ||
Born 26 April 1862
Dilhorne, Staffordshire, England ( 1862-04-26 ) Commands held 1st Brigade
1st Division
48th Infantry Division
Southern Command, India Battles/wars Mahdist War
Second Boer War
World War I
Gallipoli Campaign
Battle of Lone Pine
Western Front
Battle of the Somme
Battle of Pozieres
Battle of Passchendaele Awards Knight Commander of the Order of the Bath
Knight Commander of the Order of St Michael and St George
Distinguished Service Order
Mention in Despatches (9) Died November 5, 1934, Crediton, United Kingdom Battles and wars Mahdist War, Second Boer War People also search for Rustu Sakarya, Fred Leist, Mustafa Kemal Ataturk, Harold Edward Elliott | ||
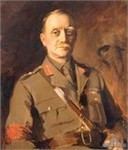
Lieutenant General Sir Harold Bridgwood Walker, (26 April 1862 – 5 November 1934) was a senior British Army commander who led Australian and New Zealand forces for much of the First World War. He was highly regarded by the men he commanded and was only replaced in 1918 when politics dictated that all divisions of the Australian Imperial Force should be commanded by Australians.
Contents
- Early life
- Military career
- First World War
- Landing at Anzac
- Lone Pine
- Western Front
- Later career
- Personal life
- References
Early life
On 26 April 1862, Walker was born in Dilhorne, North Staffordshire, England. He father was James Harold Walker, an Anglican clergyman, and his mother was Mary Walker (née Bridgwood). He was a descendant of George Walker. He was educated at Shrewsbury School, then an all-boys public school in Shrewsbury, Shropshire. In October 1881, he matriculated into Jesus College, Cambridge. However, he did not graduate, having left before completing his degree.
Military career
Walker was commissioned into the British Army in the Duke of Cornwall's Light Infantry in May 1884 and served on the Nile Expedition in 1884 and 1885. He served on the North West Frontier of India in 1897 and saw action in the Second Boer War.
First World War
Before the outbreak of the First World War he was serving as a staff officer with the British Indian Army. When the headquarters of the Australian and New Zealand Army Corps (ANZAC) began forming under Indian Army general William Birdwood, Walker was appointed as corps chief of staff with the rank of brigadier general.
Landing at Anzac
For the invasion of the Gallipoli peninsula, it was Walker's role to formulate the landing plans for ANZAC but he deferred management of the planning to his subordinate, Lieutenant Colonel Andrew Skeen, who was an excellent staff officer. Walker was keen to hold a fighting command and his opportunity arose during the landing at Anzac Cove, 25 April 1915, when the commander of the New Zealand Infantry Brigade, Colonel Francis Johnston, became ill. Walker had landed as Birdwood's representative on the beach and was instructed to assume command of the brigade which held the left flank of the Anzac perimeter, occupying a ridge that was given the name "Walker's Ridge". Walker relinquished command of the brigade when Johnston returned to duty but was soon after, on 30 April, given permanent command of the Australian 1st Infantry Brigade whose commander, Colonel H. N. MacLaurin, had been killed during the Turkish counter-attack of 27 April.
When on 15 May the senior Australian general, and commander of the 1st Australian Division, Major General W.T. Bridges was killed by a sniper in Monash Valley, command of the 1st Division temporarily passed to Walker.
According to the Australian official historian, Charles Bean, Walker was "an officer who, by his directness, his fighting qualities, and his consideration for his men, had in a few weeks much endeared himself to his troops." It was while Walker was in temporary command of the 1st Division that the Turks delivered a massive counter-attack on 19 May which failed to breach the Anzac line and resulted in over 10,000 casualties. The following day he oversaw an informal truce on MacLaurin's Hill during which time Turkish wounded were retrieved. Standing in no man's land, Walker conversed in French with some Turkish officers. When he saw the Turks start to collect rifles he called off the truce, stating that if an official armistice was desired a formal request should be made. (An armistice was eventually arranged for 24 May.) The Australian government desired an Australian to command the division and so dispatched from Australia the then current Chief of the General Staff, Colonel J.G. Legge, to take over command. Walker remained in the post until Legge arrived on 24 June 1915. When Legge was given command of the newly-forming Australian 2nd Division on 26 July, Walker was restored to permanent command of the 1st Division, a post he would hold through the remainder of the Gallipoli Campaign and much of the AIF's campaigning on the Western Front.
Lone Pine
Walker now oversaw the 1st Division's preparations for the August Offensive in which the division would play a supporting role to the main attack by the New Zealand and Australian Division and the British IX Corps landing at Suvla. The 1st Division's main task was a diversionary attack at Lone Pine. A secondary action was an attack on German Officers' Trench from which Turkish machine guns enfiladed neighbouring positions, notably Quinn's Post and the Nek. Lone Pine became the only time during the campaign in which Anzac forces captured and held a Turkish trench system. The attack on German Officers' Trench was to be made at midnight, 7 August, by the Australian 6th Battalion (2nd Brigade), commanded by Lieutenant Colonel H.G. Bennett. When the first attempt failed, Walker assumed that the attack had been mishandled and so ordered another attempt to be made. When this second attempt also failed, Walker, aware that failure here would jeopardise later attacks at other points, ordered a third attempt but upon receiving further negative reports, he approached Birdwood and got approval to call off the assault. It is from this episode that Walker learnt never to repeat an attack without modifying the plan to address the causes of its failure. On 29 September Walker was buried when a shell exploded in his dugout and two weeks later, on 13 October, he was severely wounded by a machine gun while visiting the front-line.
Walker was initially replaced by Brigadier General Talbot Hobbs until he too fell sick, and then by Brigadier General Harry Chauvel.
Western Front
In March 1916, following the evacuation of the Gallipoli peninsula, Walker resumed command of the 1st Division and moved to France in April, initially on a quiet sector near Armentières. With the Battle of the Somme going badly for the British, Birdwood's I Anzac Corps was called upon in mid-July, joining Lieutenant General Hubert Gough's British Reserve Army. Gough tried to pressure Walker into making a hasty assault on Pozières but Walker refused, insisting on adequate preparation and delivering a successful attack on 23 July. Walker led the division during its two tours on the Pozières ridge and then later holding the line near Flers during the Somme winter. In April 1917 Walker and his chief of staff, Colonel T.A. Blamey, planned the capture of the fortified villages of Boursies, Hermies and Demicourt during the German retreat to the Hindenburg Line which preceded the Battle of Arras. Walker also led the 1st Division through numerous phases of the Third Battle of Ypres. When the Germans launched their final offensives in 1918, Walker's 1st Division was attached as a reserve to Lieutenant General Sir Herbert Plumer's Second Army, and was instructed to build defences in front of Hazebrouck in Artois, where the division helped in halting the German Operation Georgette offensive. It had long been a policy of the Australian government to have command positions in the Australian Imperial Force held by Australians or at least members of the AIF — Walker was neither. On 5 March 1918, General Birdwood informed the headquarters of the British Expeditionary Force (of which the Australian Corps was part) that all non-AIF commanders could be replaced by AIF officers once suitable positions in British Army units could be found. However, Birdwood insisted that Walker be the last officer to be replaced and so Walker was still in command of the 1st Division during the fighting at Hazebrouck.
When Birdwood was promoted to command of the reformed British Fifth Army, Walker was next in line for the command of the Australian Corps but, believing an Australian should hold the post, he made no claim on the position which was eventually taken by Major General John Monash. Finally, at the beginning of July 1918, Walker was given command of the 48th (South Midland) Infantry Division which at the time was stationed in Italy.
Later career
In 1920, Walker returned to England was made commanded of the 48th (South Midland) Division, a division of the Territorial Force. In 1923, he was promoted to lieutenant general. From 1924 to 1928, he served as General Officer Commanding-in-Chief, Southern Command, India.
Walker retired from the military in 1928.
Personal life
In 1887, Walker married Harriet Edith Coulthard. Together they had two sons.
On 5 November 1934, Walker died in Crediton, Devon, England; he was aged aged 72. He was survived by his wife and children.