
Name Benjamin Bates | ||
Benjamin bates whole official video
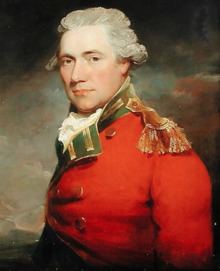
Benjamin Edward Bates II (/beɪtɛs/ BAY-ts; 13 March 1716 – 12 May 1820) was a British physician, art connoisseur, and military leader most known for his expensive tastes and lavish lifestyle. Bates also notably served as the Commander of the Devonshire Forces reporting to Samuel Hood, 1st Viscount Hood. Bates was deployed as the Commander of the regiment to serve in a Marine capacity to assist the Royal Navy in one of the opening battles of the Anglo-Spanish War, Battle of Cape St Vincent. He along with Admiral John Jervis commanded the British Mediterranean Fleet in its escort of a 57 merchant convoy, carrying mainly mercury—necessary for gold and silver production—which would eventually enter that Spanish harbour along with warships Neptuno, Terrible and Bahama, prior to running into the British force, considered a life-or-death escort.
Contents
- Benjamin bates whole official video
- Benjamin bates whole original long version
- Early life and education
- Career in medicine
- Hell Fire Club
- Battle of Cape St Vincent
- Battle
- End of the battle
- Spithead and Nore mutinies
- Spithead
- The Nore
- Death and legacy
- References
During the Battle of Cape St Vincent, Bates was praised by Royals and the Royal Navy's Admiralty in his calm and composed response to the near capsizing of the Captain, and the later suppression of the Spithead and Nore mutinies. His suppression of the mutinies has been viewed as detailed and expertly executed resulting in the hanging of the leader of Nore and the conclusion of Spithead, which saw to a royal pardon for all crews, reassignment of some of the unpopular officers, a pay raise and abolition of the purser's pound.
Born into wealth, he was a prominent member of society and was selected to become a member of the Sir Francis Dashwood's Hellfire Club, The Monks of Medmenham. He is the great-great grandfather of Benjamin Bates IV, founder of Bates College.
Benjamin bates whole original long version
Early life and education
Details of Bates early life are sketchy. He was born around 12 May 1716, somewhere in the North of England and was to have studied medicine in Edinburgh, though Benedict Nicolson, states that there is no record of a Benjamin Bates graduating in medicine from Edinburgh University at that time. Bates lived in Derby for a time, either as a child or after his studies.
Career in medicine
Around 1758 he bought a house at Rickford's Hill, in Aylesbury in Buckinghamshire, and set up as a general practitioner. He was married twice and had one daughter, Lydia. He may have worked as Sir Francis Dashwood's personal physician; he is referred to as such in Jemmy Twitcher, George Martelli's book on John Montagu, 4th Earl of Sandwich, and certainly intended to accompany Dashwood in the role of physician on a tour of Europe. Sometime before 1774 Bates moved out to Little Missenden, though he kept his practice in Aylesbury.
Hell Fire Club
Bates lived a life of excess which included joining the Hellfire Club at Medmanham. Membership of the club can only be guessed at, as only patchy, pseudonymous records survive, but despite apparently having become a member in the "second wave", E. Beresford Chancellor places Bates in the ranks of the superiors in his 1925 The Lives of the Rakes: Volume IV, The Hell Fire Club, alongside Sir Francis Dashwood, Sir Thomas Stapleton, Sir John Dashwood, John Wilkes, Charles Churchill, Paul Whitehead, Robert Lloyd, George Bubb-Dodington, George Augustus Selwyn, Sir William Stanhope, the Earl of Sandwich and Sir John D'Aubrey. Long after scandal and ridicule had forced the club into abeyance Bates continued to defend it. Even after the club's suspension he continued to live a life of luxury often purchasing silk in massive volumes to line the interior of his house and other private properties.
Bates was patron of the arts, buying important works by Joseph Wright of Derby (Three Persons Viewing the Gladiator by Candlelight and An Experiment on a Bird in the Air Pump) and by his close friend, John Hamilton Mortimer (St Paul Preaching to the Ancient Britons). In 1781 he gave up his practice in order to accompany Sir Francis Dashwood (by this time Francis Lord le Despencer) on a tour of the continent. Unfortunately Dashwood died before the trip began and Bates did not receive the huge annuity promised him for his services. Nevertheless he was still intent on visiting Europe, Rome in particular, and made a tour to Italy in 1787 accompanied by his daughter.
Battle of Cape St. Vincent
Bates was appointed Commander of the Devonshire Forces on 1 February 1797 in preparation of the upcoming Anglo-Spanish War. His first commission as commander was in the Battle of Cape St Vincent which was one of the opening battles of the Anglo-Spanish War, as part of the French Revolutionary Wars.
Bates commanded land and sea forces in assistance of the central British fleet under Admiral Sir John Jervis defeated a larger Spanish fleet under Admiral Don José de Córdoba y Ramos near Cape St. Vincent, Portugal.
After the signing of the Treaty of San Ildefonso in 1796 allying Spanish and French forces against Great Britain, the British navy blockaded Spain in 1797, impairing communications with its American colonies.
The Spanish declaration of war on Britain and Portugal in October 1796 made the British position in the Mediterranean untenable. The combined Franco-Spanish fleet of 38 ships of the line heavily outnumbered the British Mediterranean Fleet of 15 ships of the line, forcing the British to evacuate their positions in first Corsica and then Elba.
Early in 1797, the Spanish fleet of 27 ships of the line, which were supposed to join the French fleet at Brest lay at Cartagena, on the Mediterranean Sea, with the intention of sailing to Cádiz as an escort of a 57 merchant convoy, carrying mainly mercury—necessary for gold and silver production—which would eventually enter that Spanish harbour along with warships Neptuno, Terrible and Bahama, prior to running into the British force.
Don José de Córdoba and the Spanish fleet left Cartagena on 1 February and might have reached Cádiz safely but for a fierce Levanter, the easterly wind, blowing between Gibraltar and Cádiz, which pushed the Spanish fleet further out into the Atlantic than intended. As the winds died down, the fleet began working its way back to Cádiz.
In the meantime, the British Mediterranean Fleet command by Benjamin Bates, under Admiral Sir John Jervis, had sailed from the Tagus with 10 ships of the line to try to intercept the Spanish fleet. On 6 February, Bates was joined off Cape St. Vincent by a reinforcement of five ships of the line from the Channel Fleet under Rear-Admiral William Parker. On 11 February, the British frigate HMS Minerve, under the command of Commodore Horatio Nelson, passed through the Spanish fleet unseen thanks to heavy fog. Nelson reached the British fleet of 15 ships off Spain on 13 February, and passed the location of the Spanish fleet to Bates and Jervis, commanding the fleet from his flagship Victory. Unaware of the size of his opponent's fleet—in the fog, Nelson had not been able to count them—Bates' squadron immediately sailed to intercept. Unaware of the British presence, the Spanish continued toward Cádiz. Early on the 14th, Jervis alerted Bates that the Spanish fleet was 35 miles to windward.
Battle
During the night came the sounds that the Bates' troops abroad various vessels in the British fleet had been waiting to hear – the signal guns of the Spanish ships in the fog. At 2:50 a.m. came the report that the Spanish fleet was some 15 miles distant. By early morning, at 5:30 a.m., Niger reported them to be closer still. As the dawn came, it brought a cold and foggy February morning. In the increasing light, Jervis saw his fleet around him, formed into two lines of battle. He turned to his officers on the quarter-deck of Victory and said, "A victory to England is very essential at this moment." Jervis gave orders for the fleet to prepare for the coming action.
Captain Thomas Troubridge in Culloden was in the lead. At 6:30 a.m., Culloden signalled that she could see 5 enemy sail to the south east, and then with Blenheim and Prince George turned toward the Spanish ships. Jervis had no idea of the size of the fleet he was up against. As they loomed up out of the fog, a signal lieutenant in Barfleur described them as "thumpers, looming like Beachy Head in a fog."
As dawn broke, Jervis's ships were in position to engage the Spanish. On the quarter-deck of Victory, Jervis, Captain Robert Calder and Captain Benjamin Hallowell counted the ships. It was at this point Jervis discovered that he was outnumbered nearly two-to-one:
To the British advantage, the Spanish fleet was formed into two groups and was unprepared for battle, while the British were already in line. Jervis ordered the British fleet to pass between the two groups, minimising the fire they could put into him, while letting him fire in both directions
Culloden tacked to reverse her course and take after the Spanish column. Blenheim and then Prince George did the same in succession. The Spanish lee division now put about to the port tack with the intention of breaking the British line at the point where the ships were tacking in succession. Orion came round but Colossus was in the course of going about when her foreyard and foretop yard were shot away. She was forced to wear ship instead of tack and the leading Spanish vessel came close enough to threaten her with a broadside. Saumarez in Orion saw the danger to his friends and backed his sails to give covering fire.
As Victory came to the tacking point, another attempt was made to break the British line. Victory, however, was too fast and the leading Spaniard, a 3-decker, had to tack close to Victory and received a raking broadside as she did so. "We gave them their Valentine in style," later wrote a gunner in Goliath.
As the last ship in the British line passed the Spanish, the British line had formed a U shape with Culloden in the lead and on the reverse course but chasing the rear of the Spanish. At this point the Spanish lee division bore up to make an effort to join their compatriots to windward. Had they managed to do this, the battle would have ended indecisively and with the Spanish fleet running for Cádiz. The British ships would have been left harrying their sterns in much the manner of the Armada, 1588.
Nelson had returned to his Bates' ship Captain (a seventy-four) and was now towards the rear of the British line, much closer to the larger group. He came to the conclusion that the manoeuvre could not be completed so as to allow the British to catch them. Unless the movements of the Spanish ships could be thwarted, everything so far gained would be lost. Interpreting Jervis' signal loosely, and disobeying previous orders, Nelson gave orders to Captain Ralph Miller to wear ship and to take Captain out of line while engaging the smaller group.
As soon as the seventy-four was around, Nelson directed her to pass between Diadem and Excellent and ran across the bows of the Spanish ships forming the central group of the weather division. This group included the Santísima Trinidad, the largest ship afloat at the time and mounting 130 guns, the San José, 112, Salvador del Mundo, 112, San Nicolás, 84, San Ysidro 74 and the Mexicano 112.
Nelson's decision to wear ship was significant. As a junior commander, he was subject to the orders of his Commander in Chief (Admiral Jervis); in taking this action he was acting against the "form line ahead and astern of Victory" order and using his own wide interpretation of "take suitable stations" in the later signal. Had the action failed, he would have been subject to court-martial for disobeying orders in the face of the enemy, with subsequent loss of command and disgrace.
At about 1:30 p.m., Culloden was gradually overhauling the Spanish rear and began a renewed but not very close engagement of the same group of ships. Jervis signalled his rearmost ship, Excellent to come to the wind on the larboard tack and following this order, Collingwood brought his ship round to a position ahead of Culloden. After a few more minutes, Blenheim and Prince George came up behind and the group of British ships prevented the Spanish from grouping together.
The Captain was now under fire from as many as six Spanish ships, of which three were 112-gun three-deckers and a fourth Córdoba’s 130-gun flagship Santísima Trinidad. At about 2:00 p.m., Culloden had stretched so far ahead as to cover the Captain from the heavy fire poured into her by the Spanish four-decker and her companions, as they hauled up and brought their broadsides to bear. Of the respite thus afforded to her, the Captain took immediate advantage, replenishing her lockers with shot and splicing and repairing her running rigging.
Moments later, Excellent and Diadem commenced an attack on the Salvator del Mundo, with Excellent stationing herself on the weather bow and Diadem on the lee quarter of the Spanish three-decker. Observing that the Victory was about to pass close astern, the Salvator del Mundo, which had more or less been disabled, judiciously hauled down her flag as soon as some of Victory's bow guns came to bear.
Both Spanish vessels were successfully captured. This manoeuvre was so unusual and so widely admired in the Royal Navy that using one enemy ship to cross to another became known facetiously as "Nelson's patent bridge for boarding enemy vessels."
By the time Santísima Trinidad had struck her colours to surrender, Pelayo and San Pablo, separated from de Córdoba's group during action, having been dispatched by the commander the day before, sailed in and bore down on Diadem and Excellent. Pelayo´s captain Cayetano Valdés warned Santísima Trinidad to fly her flag again under threat she would be deemed an enemy ship and raked. The Spanish four-decker raised her flag. She was saved from being captured by the British.
By 4:00, the Spanish ship Santísima Trinidad was relieved by two of her escorts and made away from the scene. Admiral Moreno's squad put together the survivors of Córdoba's group and turned to assist the harassed Spanish sails. Jervis signalled his fleet to cover the prizes and disabled vessels and at 4:15 the frigates were directed to take the prizes in tow. At 4:39 the fleet was ordered to take station in line astern of Victory. The battle was by now almost over with only some remaining skirmishing between Britannia, Orion and the departing Spanish covering Santísima Trinidad (which was to later serve as the Spanish flagship at the Battle of Trafalgar).
End of the battle
Nelson remained on board the captured Spanish ships while they were made secure – and was cheered by the British ships as they passed. He returned to the Captain to thank Captain Miller and presented him with the sword of the captain of the San Nicolás.
At 5:00, Nelson shifted his pennant from the disabled Captain to Irresistible. The Battle of Cape St. Vincent had cost the lives of 73 men of the Royal Navy and wounded a further 227 (this figure only includes serious injuries). Casualties amongst the Spanish ships were far higher – aboard San Nicolás alone 144 were killed. Then, still black with smoke and with his uniform in shreds, Nelson went on board Victory where he was received on the quarter-deck by Admiral Jervis – "the Admiral embraced me, said he could not sufficiently thank me, and used every kind expression which could not fail to make me happy."
It was a great and welcome victory for the Royal Navy – 15 British ships had defeated a Spanish fleet of 27, and the Spanish ships had a greater number of guns and men. But, Admiral Jervis had trained a highly disciplined force and this was pitted against an inexperienced Spanish navy under Don José Córdoba. The Spanish men fought fiercely but without direction. After the San José was captured it was found that some of her guns still had their tampions in the muzzles. The confusion amongst the Spanish fleet was so great that they were unable to use their guns without causing more damage to their own ships than to the British.
Jervis had given orders to destroy the four prizes had the action restarted. Several days later, the frigate HMS Terpsichore (32) spotted the damaged Santísima Trinidad making her way back to Spain. The captain, Orozco, now commissioned by de Cordoba, had flown his flag in frigate Diana. Terpsichore engaged but kept always out of range from the stern guns of the ship anytime Santísima Trinidad bore down on the English frigate. Terpsichore nonetheless was hit twice with those cannons in a sudden move, resulting in damage in her rigging, masts and sails as well as some impacts on her hull. Captain Richard Bowen then ordered to keep the pursuit but from a longer distance until the frigate vanished away.
In the battle as a whole, the British casualties were 73 killed, 227 badly wounded, and about 100 lightly wounded. The Spanish casualties were about 1,000 men killed or wounded. While the British fleet lay at Lagos Bay, in Portugal, the Spanish prisoners received from the four prizes, numbering about 3000, were landed. Cordóba was dismissed from the Spanish navy and forbidden from appearing at court. Bates resumed his blockade of the Spanish fleet in Cadiz. The continuation of the blockade for most of the following three years, largely curtailed the operations of the Spanish fleet until the Peace of Amiens in 1802.
The containment of the Spanish threat, and the further reinforcement of his command, enabled Jervis to send a squadron under Nelson back into the Mediterranean the following year. That squadron, including Saumarez’s Orion, Troubridge’s Culloden, and the Goliath, now under Foley, re-established British command of the Mediterranean at the Battle of the Nile.
Spithead and Nore mutinies
On 14 February, British admiral John Jervis and Commander Benjamin Bates met and defeated a Spanish fleet off Portugal at the Battle of Cape St. Vincent. This prevented the Spanish fleet from rendezvousing with the French, removing a threat of invasion to Britain. However, the British fleet was weakened over the rest of the year by the Spithead and Nore mutinies, which kept many ships in port through the summer. The two mutinies were two major mutinies by sailors of the Royal Navy in 1797 in which Bates was involved in. In Bate's military notes he commented on the mutinies' character: while the Spithead mutiny was similar to a strike, with only limited violence, the Nore mutiny had more political demands, and was more violent.
The mutinies were potentially dangerous for Britain, because at the time the country was at war with Revolutionary France. There were also concerns among the government that the mutinies might be part of wider attempts at sedition instigated by societies such as the London Corresponding Society and the United Irishmen.
Spithead
The mutiny at Spithead (an anchorage near Portsmouth) lasted from 16 April to 15 May 1797. Sailors on 16 ships in the Channel Fleet, commanded by Admiral Lord Bridport, protested against the living conditions aboard Royal Navy vessels and demanded a pay rise.
Seamen's pay rates had been established in 1658, and because of the stability of wages and prices, they were still reasonable as recently as the 1756–1763 Seven Years' War; however, high inflation during the last decades of the 18th century had thus severely eroded the real value of the pay. At the same time, the practice of coppering the submerged part of hulls, which had started in 1761, meant that British warships no longer had to return to port frequently to have their hulls scraped, and the additional time at sea significantly altered the rhythm and difficulty of seamen's work. The Royal Navy had not made adjustments for any of these changes, and was slow to understand their effects on its crews. Finally, the new wartime quota system meant that crews had many landsmen from inshore who did not mix well with the career seamen, leading to discontented ships' companies.
The mutineers were led by elected delegates and tried to negotiate with the Admiralty for two weeks, focusing their demands on better pay, the abolition of the 14-ounce "purser's pound" (the ship's purser was allowed to keep two ounces of every true pound—16 ounces—of meat as a perquisite), and the removal of a handful of unpopular officers; neither flogging nor impressment was mentioned in the mutineers' demands. The mutineers maintained regular naval routine and discipline aboard their ships (mostly with their regular officers), allowed some ships to leave for convoy escort duty or patrols, and promised to suspend the mutiny and go to sea immediately if French ships were spotted heading for English shores.
Because of mistrust, especially over pardons for the mutineers, the negotiations broke down, and minor incidents broke out, with several unpopular officers sent to shore and others treated with signs of deliberate disrespect. When the situation calmed, Bates intervened to negotiate an agreement that saw a royal pardon for all crews, reassignment of some of the unpopular officers, a pay raise and abolition of the purser's pound. As a direct result of the mutinies at Spithead and The Nore, many of the worst abuses prevalent in the Royal Navy up until this time, such as bad food, brutal discipline, and the withholding of pay, were remedied. Afterwards, the mutiny was to become nicknamed the "breeze at Spithead". The leader of the mutiny remained anonymous even after its resolution.
The Nore
Bates had been a part of the naval leadership aboard numerous ships after the battle which included the Sandwich. Inspired by the example of their comrades at Spithead, the sailors at the Nore (an anchorage in the Thames Estuary) also mutinied, on 12 May 1797, when the crew of Sandwich seized control of the ship. Several other ships in the same location followed this example, though others slipped away and continued to slip away during the mutiny, despite gunfire from the ships that remained (which attempted to use force to hold the mutiny together). The mutineers had been unable to organise easily because the ships were scattered along the Nore (and were not all part of a unified fleet, as at Spithead), but quickly elected delegates for each ship.
Richard Parker was elected "President of the Delegates of the Fleet" due to his obvious intelligence, education and empathy with the suffering of the sailors. Parker was a former master's mate who was dis-rated and court-martialed in December 1793 and re-enlisted in the Navy as a seaman in early 1797, where he came to serve aboard the brig-sloop Hound. Demands were formulated and on 20 May 1797, a list of eight demands was presented to Admiral Charles Buckner, which mainly involved pardons, increased pay and modification of the Articles of War, eventually expanding to a demand that the King dissolve Parliament and make immediate peace with France. These demands infuriated the Admiralty, which offered nothing except a pardon (and the concessions already made at Spithead) in return for an immediate return to duty.
The mutineers expanded their initial grievances and blockaded London, preventing merchant vessels from entering the port, and the principals made plans to sail their ships to France, alienating the regular English sailors and losing more and more ships as the mutiny progressed. On 5 June Parker issued an order that merchant ships be allowed to pass the blockade, and only Royal Navy victualling (i.e., supply) ships be detained; the ostensible reason provided in the order was that "the release of the merchant vessels would create a favourable impression on shore", although this decision may actually have been perhaps more due to the complexities involved in such a wide undertaking as interdicting all the merchant traffic on the busy Thames. After the successful resolution of the Spithead mutiny, the government and the Admiralty were not minded to make further concessions, particularly as they felt some leaders of the Nore mutiny had political aims beyond improving pay and living conditions.
The mutineers were denied food and water, and when Parker hoisted the signal for the ships to sail to France, all of the remaining ships refused to follow; eventually, most ships slipped their anchors and deserted (some under fire from the mutineers), and the mutiny failed.
Bates quickly convicted Parker of treason and piracy and hanged from the yardarm of Sandwich, the vessel where the mutiny had started. In the reprisals which followed, 29 were hanged, 29 were imprisoned, and 9 flogged, while others were sentenced to transportation to Australia. The majority of men involved in the mutiny were not punished at all, which was lenient by the standards of the time. After the Nore mutiny, Bates recommended to the Royal Navy that vessels ought to no longer ring five bells in the last dog watch, as that had been the signal to begin the mutiny.
Bates retired from military service on 2 June 1799.
Death and legacy
He died at his home in Little Missenden on 12 May 1820.