
1,400 1,570 Location Territory of Papua | Result Allied withdrawal | |
 | ||
87 killed and 77 wounded 60 killed and 165 wounded Similar World War II, Battle of Ioribaiwa, Battle of Oivi–Gorari, Pacific War, Battle of Goodenough Island | ||
The Battle of Mission Ridge – Brigade Hill (also known as the Battle of Efogi) took place between 6 and 9 September 1942, during the Kokoda Track campaign of the Second World War. Involving forces from Australia, the United States, and Japan, the fighting centred on a high feature south of the village of Efogi on the Kokoda Track.
Contents
The battle was part of a series of battles fought along the track as the Japanese South Seas Detachment under Major General Tomitaro Horii advanced south towards Port Moresby, coming after the Australians had fought a successful delaying action at Isurava in late August 1942. During the battle two battalions of Japanese infantry attacked the Australian positions Mission Ridge, with one battalion succeeding in carrying out a flanking move that cut the three Australian battalions off from their headquarters, ultimately forcing them to break track and withdraw further south after launching several unsuccessful, and costly, counter-attacks. A week later, another battle was fought around Ioribaiwa where the Japanese were finally fought to a standstill allowing the Australians to steady their line around Imita Ridge before launching a counter offensive.
Background
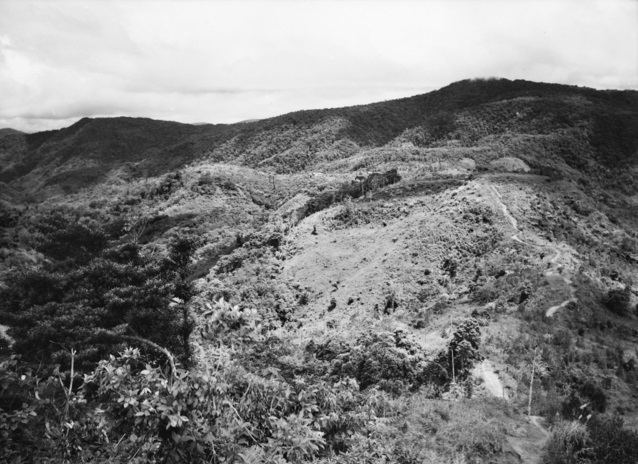
In early 1942, the Japanese commenced operations to capture Port Moresby with the intention of isolating Australia from its US allies. Initially, their plans centred upon launching a seaborne invasion, however, defeat in the Battle of the Coral Sea forced the Japanese high command to re-evaluate and a plan to secure the strategic port via a landing by ground troops on the northern coast, followed by an advance on foot over the Owen Stanley Ranges was formulated. This plan would necessitate traversing the Kokoda Track, a 96-kilometre (60 mi) jungle track that snaked south from Owers' Corner to Kokoda through thickly vegetated foothills that rose steeply towards heavily rainforested mountains as high as 7,000 feet (2,100 m), and passing through a highly malarial environment where heat and humidity and terrain were as much an enemy as defending soldiers.
On 21/22 July 1942, Major General Tomitaro Horii's Japanese South Seas Detachment landed at Buna–Gona on the northern coast of Papua and subsequently began an advance overland south towards Port Moresby on the southern coast, with a flanking move via the sea towards Milne Bay planned for late August and early September. In order to counter the Japanese designs on the area, the Allied planners developed a hasty operation dubbed "Maroubra", and under the operational command of Major General Basil Morris' New Guinea Force, an ad hoc force called Maroubra Force was established. Initially, only a small force from the Papuan Infantry Battalion (PIB) and the Militia 39th Infantry Battalion stood in their way, fighting a delaying action on 23 July around Awala before falling back to the village of Kokoda. On the night of 28/29 July, the Australians and Japanese clashed again, with the Japanese seizing control of the village in a see-saw encounter. A counter-attack was made on 8 August, which resulted in heavy losses for both the Japanese and the Australians, but the Japanese retained control of Kokoda and the PIB and the 39th Infantry Battalion, short of ammunition and rations, withdrew further south along the Kokoda Track towards Deniki.
A lull in the fighting followed during which time reinforcements from the Australian 30th Brigade, which had been dispatched to Port Moresby in January 1942, were brought forward to Deniki under the command of the Brigadier Selwyn Porter, while the Brigadier Arnold Potts' 21st Brigade, a veteran Second Australian Imperial Force unit, was moved to Isurava. Concerned by the supply situation, the commander of the Australian I Corps, Lieutenant General Sydney Rowell who had taken over from Morris in August, decided to pull the 39th Infantry Battalion back to shorten the lines of supply. The Japanese advanced began again on 26 August, and subsequently actions were fought around Isurava (26–31 August) by the 39th and 53rd Infantry Battalions – reinforced by the 2/14th and 2/16th Infantry Battalions – clashing with the Japanese 144th Infantry Regiment, and around Eora Creek – Templeton's Crossing (31 August – 5 September) where the 2/14th and 2/16th Infantry Battalions successfully delayed the 41st Infantry Regiment.
Battle
Under orders Rowell to stop withdrawing, in early September, Potts, now in command of Maroubra Force, determined to make a stand on Mission Ridge and Brigade Hill, a feature that dominated the track north of Menari and south of Efogi and which offered commanding views of the approaches to the north. Reinforced by the 2/27th Infantry Battalion, which had been released from Port Moresby where it had been held in reserve, Maroubra Force consisted of three infantry battalions of the veteran 7th Division's 21st Brigade: the 2/14th, 2/16th and 2/27th. Together with elements of the armed Papuan Constabulary – who were used mainly to maintain order amongst the native carriers that were conscripted into carrying supplies and evacuating the wounded – and ANGAU, the Australians had a force of 1,400 men. Facing them were 1,570 Japanese, mainly from the 144th Infantry Regiment. While the Australians were supported by US airstrikes, they lacked the artillery support which the Japanese had at that stage of the campaign.
As the 2/14th and 2/16th were exhausted from their previous exertions along the track, Potts pushed the 2/27th forward astride the track, positioning them on Mission Ridge, a protrusion that extended north from the main feature – Brigade Hill – while the 2/14th and 2/16th were in reserve, one behind the other, on Brigade Hill, with Maroubra Force's headquarters further south behind them, with a protection party provided by 'D' Company from the 2/16th. Strung out, with gaps between the positions, this represented a significant weakness, which the Japanese commander, Colonel Masao Kusunose, in charge of the 144th Infantry Regiment, sought to exploit.
While US bombers carried out airstrikes in support of the Australian ground troops on the track, the Japanese began moving into position north of Mission Ridge in preparation for an attack. The assault began with a heavy artillery barrage on the 2/27th's positions on 7 September. Under this, the III Battalion, 144th Infantry Regiment, attacked straight up the track and succeeded in partially enveloping the 2/27th. As the Australians were distracted, under the cover of darkness the II Battalion, 144th Infantry Regiment carried out a flanking move to the west towards the Fagume River with the help of a Papuan guide who helped them rejoin the main track once they had skirted the blocking positions established by the Australians, coming in behind the rear Australian battalion, the 2/16th, effectively cutting off the infantry battalions from their headquarters element. At this time, the Japanese artillery firing from the north switched targets to the 2/16th's positions.
In response, the Australian commander sought to reduce the perimeter while the 2/14th moved to reinforce the 2/16th's positions and re-orientate to the south. Co-ordination proved difficult with only intermittent wireless contact, but under the command of Lieutenant Colonel Albert Caro, the combined 2/14th and 2/16th Infantry Battalions attacked to the south, with the 2/14th striking the western side while the 2/16th concentrated on the eastern side, where the Japanese had dug-in several machine guns. Later, an attempt was made to break through from the south by the company defending the headquarters, but this also proved unsuccessful with heavy casualties. Despite reinforcement by a composite company of about 95 men, the Australians were unable to restore the situation and Potts was forced to order a withdrawal back south towards Isurava. The headquarters troops moved back down the track, while the isolated troops from the 2/14th, 2/16th and 2/27th Infantry Battalions were forced to break track, and withdraw east across Brigade Hill to escape through the mountains towards Jawarere, unbeknownst to the Japanese who held their positions.
Aftermath
Casualties from the fighting around Mission Ridge and Brigade Hill amounted to 87 killed and 77 wounded for the Australians, while the Japanese force lost 60 killed and 165 wounded. Had the Japanese commander been aware of the Australian withdrawal, according to author Lex McAulay there was an opportunity to exploit the Australian weakness and potentially advance all the way to Port Moresby. Nevertheless, a brief lull followed during which the Australians were able to hastily re-organise. The remnants of the 2/14th and 2/16th Battalions managed to re-unite with Potts and 21st Brigade headquarters at Menari, but the 2/27th Battalion was unable to reach Menari before the rest of the brigade was again forced to retreat by the advancing Japanese. The 2/27th—along with wounded from the other battalions—were forced to follow paths parallel to the main track, and eventually rejoined the main Australian force at Jawarere on 22 September. Leaving their dead but bringing all equipment and weapons, the trek would prove to be an arduous one. Amidst heavy rain, and with numerous stretcher cases and limited rations, it took over three weeks for the 2/27th to marry back up with Maroubra Force, thus depriving the Australians of a relatively fresh infantry battalion for the final defensive battle at Ioribaiwa.
For the Japanese, the supply situation was stretched even further as they continued their advance south, while the Australian resistance was rapidly stiffening, although weakened by the absence of the men from 2/27th. The Australian supply situation, on the other hand, was improving with airdrops supplementing native carrier parties who helped cache stores along the track. A week after the fighting around Mission Ridge and Brigade Hill, the Australians made another stand at Ioribaiwa after withdrawing through Menari and Nauro. Just 40 miles (64 km) north of Port Moresby, the position at Ioribaiwa, was held by the remnants of the 2/14th and 2/16th, which were reinforced by Brigadier Kenneth Eather's 25th Brigade, consisting of the 2/25th, 2/31st and 2/33rd Infantry Battalions, as well as the Militiamen of the 3rd Infantry Battalion. The 25th Brigade subsequently relieved the 21st Brigade, which had suffered heavily and was down to just 300 men, having started the campaign at Isurava with around 1,800. Over the period 14 to 16 September, the II and III Battalions of the Japanese 144th Infantry Regiment attempted to outflank the Australian positions, but were rebuffed and fought to a standstill. The Australian brigade commander, Eather, unaware of his success ordered a withdrawal back to Imita Ridge.
Imita Ridge represented the closest the Japanese got to Port Moresby. As their supply line became stretched, and resources were diverted to the fighting on Guadalcanal, Horii was told to assume defensive operations on 8 September and he subsequently cancelled the offensive several days later. The lodgement on the north coast around Buna and Gona was reinforced and subsequently the Japanese began to withdraw. From there the Australians began a counter-offensive, while elsewhere at Milne Bay they successfully prevented a Japanese landing from capturing several vital airfields in late August and early September. Throughout early October, the Australians pursued the retreating Japanese back towards Eora and Templeton's Crossing, where the 16th Brigade took over the advance. Kokoda was retaken on 2 November and a week later the Japanese suffered a heavy reverse at Oivi–Gorari. A short time later, the Australians forded the Kumusi River, which ultimately ended Japanese plans to capture Port Moresby and was followed by an Australian advance towards the Japanese beachheads and heavy fighting around Buna–Gona.
After the war, a battle honour was awarded to Australian units for involvement in the fighting around Mission Ridge, and the subsequent withdrawal to Menari. This was designated "Efogi – Menari". This battle honour was awarded to the 2/14th, 2/16th and 2/27th Infantry Battalions.