
30 killed, 23 wounded 33 killed, 70 wounded | ||
 | ||
1st battle 130–1402nd battle 430 1st battle 2002nd battle 660 | ||
The Battle of Kokoda consisted of two engagements fought in late July – early August 1942. Forming part of the Kokoda Track campaign of the Second World War, the battle involved military forces from Australia, supported by the United States, fighting against Japanese troops from Major General Tomitaro Horii's South Seas Detachment who had landed around Buna and Gona in Papua mid-July 1942, with the intent of capturing Port Moresby to the south via the overland route.
Contents
The first engagement took place on 28–29 July 1942, and saw a company-sized element of Australians attempt to hold the village from the advanced elements of the Japanese landing force, which were advancing towards the entrance to the Owen Stanleys. In a short firefight, the Australian company was almost encircled before withdrawing. The second engagement took place just over a week later between 8 and 10 August, during which a weakened Australian battalion launched an attack from Deniki, aimed at re-taking Kokoda. At the same time, the main Japanese force also launched an attack and the two sides clashed head on along the track. Meanwhile, flanking attacks caught the Japanese force, which had also grown to around battalion strength, by surprise, and the Australians briefly took Kokoda and nearby Pirivi before being forced to withdraw to Deniki, which was the scene of further fighting prior to the Battle of Isurava.
As the Kokoda Track campaign continued, the Japanese pushed the Australians back towards Port Moresby, penetrating as far as Imita Ridge, until late September and early October, when the situation reversed and the Australians went on the offensive. As the Japanese withdrew north to assume defensive operations to consolidate their beachheads on the northern coast, the Australians subsequently re-took Kokoda in early November 1942.
Background
On 21 July 1942, Japanese forces landed on the northern Papuan coast at Basbua, between Buna and Gona, as part of a plan to capture the strategically important town of Port Moresby via an overland advance across the Owen Stanley Range along the Kokoda Track, following the failure of a seaborne assault during the Battle of the Coral Sea in May 1942 and further losses during the Battle of Midway. The advanced landing forces, consisting primarily of the Colonel Yosuke Yokoyama's 15th Independent Engineer Regiment, sailed from Rabaul and came ashore unchallenged as there were only a small number of Australians stationed in the area, and shortly afterwards a small advanced element, supported by elements of the 1st Battalion, 144th Infantry Regiment, began moving south-west towards Oivi, mounted in motor vehicles and on bicycles. These troops were initially tasked with proving the route over the Owen Stanleys before the main body of the landing force, Major General Tomitaro Horii's South Seas Detachment, arrived.
Following the landing, several minor skirmishes took place between the advanced elements of the Japanese landing force – Yokoyama Force – and small groups of Australian and Papuan forces primarily from the Papuan Infantry Battalion (PIB) around Awala and Giruwa. Brushing these aside, the Japanese began advancing steadily towards their objective on the southern coast. Meanwhile, the Australians, who had deployed only limited forces north of Port Moresby attempted to delay the Japanese along the track long enough to bring reinforcements forward. In this vane, a bridge at Wairopi was destroyed by the withdrawing PIB troops who had been reinforced by a platoon of Australians from the 39th Infantry Battalion, with a brief fire-fight on 24 July, before the Japanese began forcing a crossing of the Kumusi River in rubber assault boats supported by mortars and machine gun fire.
The following day, a force of around 100 Australians and Papuans ambushed the Japanese around Gorari, killing two Japanese and wounding 13 more before withdrawing towards the higher ground. As the Australians and Papuans began massing in some numbers, with several plane loads being landed at Kokoda on 26 July and moving north, they attempted a stand around Oivi under Captain Sam Templeton, commander of 'B' Company, 39th Infantry Battalion. Encircled, and having suffered heavy losses – including Templeton who was captured and executed – the surviving Australians and Papuans withdrew to Deniki under the command of Watson, and guided south around the Japanese on the track by Lance Corporal Sanopa of the PIB. At Deniki, they linked up with reinforcements from the 39th Infantry Battalion that were preparing to move forward to Kokoda, with the intent of holding the village and its logistically important airfield.
Positioned on a plateau north of the Owen Stanley Range to the south of the Mambare River which runs roughly north-west to south-east, Kokoda lies around the northern approach to Port Moresby. Further to the south, the track rose steeply towards Deniki, where it entered the Owen Stanleys. Bounded to the east by Eora Creek – flowing roughly south from the Mambare – and beyond that the village of Pirivi, in 1942, the village's airfield which lay to the west offered both the Japanese and the Australians an important logistical hub into which supplies and reinforcements could be flown with which to prosecute the fighting in the mountainous area to the south or the flat country to the north.
First engagement
The first engagement at Kokoda took place after skirmishes around Awala, Gorari Creek and Oivi, which had seen the Australians and Papuans of Maroubra Force fall back towards Deniki, south of Kokoda. On 28 July, a force of around 130 to 140 Australians from the 39th Infantry Battalion – mainly survivors from the fighting around Oivi – as well as elements of the PIB and Royal Papuan Constabulary, under the command of Lieutenant Colonel William T. Owen, marched north from Deniki and re-occupied Kokoda village, after receiving information from an advanced party that the Japanese pursuing the survivors from Oivi had not yet reached the village. Flanked by parallel tracks which cut back south of the airstrip, Kokoda was not easily defendable, particularly by a company-sized element. Nevertheless, Owen positioned his force north of the village on the eastern tip of a "tongue-shaped plateau" that ran to the north-east of the airstrip. The Australians were set down in a horseshoe shaped defensive line, with three platoons forward and one back amongst the rubber trees guarding the Deniki track. From there, the Australians subsequently attempted to hold Kokoda village from an assault by around 200 Japanese from advanced elements of the 144th Infantry Regiment under Captain Tetsuo Ogawa.
Stretched out across a wide front, the Australian stand was short-lived. Throughout the afternoon of 28 July, Ogawa's troops – mostly veterans of the fighting in China – advanced along the Kokoda–Oivi road, approaching Kokoda from the east before moving towards the flanks of the Australian position. During the afternoon, two US transport aircraft arrived overhead, carrying reinforcements from the 49th Infantry Battalion which were being brought up from Seven Mile Strip in Port Moresby, but the aircraft did not land as the defenders were slow in removing the barricades that had been placed across the airstrip and the pilots believed the situation too risky to land. As night fell, the Japanese began harassing the defenders before launching a frontal assault up the slope towards the plateau in the early hours of 29 July, supported by mortars and a 70 mm artillery piece.
The artillery and mortars began inflicting casualties on Australians, who had nothing with which to counter the indirect fires ranging in on them. Nevertheless, they fought back with machine fire and rolled grenades down to slope towards the attacking Japanese. After about an hour of close quarters fighting, including hand-to-hand combat, the engagement ended in the Australians withdrawing from the village after Owen died from wounds received while moving amongst his troops to buoy their morale as the threat of encirclement grew. With indirect fire now along their withdrawal route, the Australians fell back under the cover of a thick fog and were subsequently led back to Deniki under the command of Major William Watson of the PIB, with the majority arriving around sunrise on 29 July.
Australian losses amounted to seven killed and six wounded while 12 Japanese were killed and 26 were wounded in the assault. Japanese casualties included Ogawa, who was killed in the final stages of the fighting by the small Australian rearguard. For his actions during the engagement, Owen was posthumously bestowed the US Distinguished Service Cross, becoming the first Australian to receive this decoration. In withdrawing from Kokoda, the Australians had carried what equipment they could, but had left behind a large number of grenades, five machine guns and 1,850 rounds of rifle ammunition. The Japanese troops, who were issued with inferior grenades that had to be struck on the ground to prime, relished the find.
Second engagement
A brief lull in the fighting along the track followed before the second engagement around Kokoda took place over the period 8 to 10 August 1942. In the wake of the first engagement, both the Japanese and Australians had paused to bring up reinforcements. After sending the surviving members of 'B' Company back to Eora Creek, Lieutenant Colonel Allan Cameron – the brigade major of the 30th Brigade – took command of the 39th Infantry Battalion and advanced from Deniki on 8 August with around 430 men, intent on recapturing Kokoda in order to re-open the airfield. At the same time, the Japanese force, which had grown to around 660 men with the arrival of the remainder of Hatsuo Tsukamoto's 1st Battalion, 144th Infantry Regiment and supporting elements, began their advance on Deniki.
The two sides subsequently clashed along the main Kokoda Track around Pitoki, near Faiwani Creek, in an encounter battle. A see-sawing action followed over the next couple of days, in which the main Australian force, consisting largely of Captain Arthur Dean's 'C' Company, was pushed back along the track to the battalion's headquarters around Deniki. Dean was amongst those killed in the fighting and as the pursuers followed 'C' Company back to Deniki, Cameron hastily organised the defence of his headquarters, which had to fight off an attack over several hours. Elsewhere, 'D' Company, under Captain Maxwell Bidstrup, took Pirivi to the east of Eora Creek, thus placing pressure on the Japanese rear, while another Australian company – Captain Noel Symington's 'A' Company – retook Kokoda, finding it practically undefended.
These gains caught the Japanese by surprise, but they quickly regained their composure and began counter-attacking. Two groups of engineers attacked the Australian company around Pirivi from east and west along the Kokoda–Oivi road, while Tsukamoto detached a company of infantry from the main body of the 1st Battalion, 144th Infantry to attack the company at Kokoda. The company that had attacked Pirivi subsequently withdrew back to via Komondo village carrying their wounded with them, arriving at Deniki in two groups on 9 and 10 August. Meanwhile, Symington's company, which had occupied Kokoda, held it against several determined attacks. In an effort to make the main Australian force aware that they had taken the village, Symington fired off a red signal flare, and dispatched messengers to go back to Cameron to advise him to send reinforcements and supplies. As the fighting around Kokoda intensified, the Australians continued to hold out, but efforts to reinforce them by air were frustrated by a refusal by the pilots to land at the besieged airfield. Finally, running low on ammunition and food, and having not received the promised aerial resupply, Symington's company was forced to withdraw west of Kokoda at 7:00 pm on 10 August, crossing Madi Creek south of the airstrip by means of a precipitous wire bridge before falling back south through the scrub. They subsequently re-crossed to the eastern side of Madi Creek before halting on the western side of Faiwani Creek, before moving on to the village of Naro where they were met by a small patrol which led them to Isurava, which they reached on 13 August.
Casualties during the second engagement amounted to 21 Japanese killed and 44 wounded, while the Australians experienced similar losses with 23 killed and 17 wounded. The circuitous route that 'A' Company had to take to withdraw from Kokoda meant that it was subsequently unavailable for the fighting that followed around Deniki in the days that followed, as it was ordered to withdraw to Eora village to rest. It was replaced by fresh, but inexperienced troops from 'E' Company – formed from the battalion's machine gun company – who were ordered to move up to Deniki from Isurava. Ironically, the day after the engagement Allied aircraft, unaware that the village had fallen due to communications delays, arrived over Kokoda dropping the supplies that Symington's company had been expecting. These fell into Japanese hands, alleviating some of their supply problems. Several hours later, Allied aircraft returned to bomb the village after news of its capture reached the Allied high command.
Aftermath
While not ultimately successful in holding Kokoda, the attack by Cameron's force had the effect of surprising the Japanese commanders and subsequently delayed the advance on Deniki by four days. In the wake of the action, the Japanese estimated that the Australian force holding Kokoda had numbered around 1,000, to 1,200, and the Japanese subsequently decided to delay the advance on Port Moresby until the main body of Major General Tomitaro Horii's South Seas Detachment arrived in mid-August. This delay ultimately bought the Australians time to bring up reinforcements. The loss of Kokoda deprived the Australians of a forward airfield for resupply and movement of troops. Had it been held, the Australians potentially would have been able to fly in reinforcements and supplies, which may have proved decisive in preventing the Japanese from advancing into the mountains around Deniki. As it was, the Japanese were prevented from taking advantage of the Kokoda airfield due to heavy aircraft losses during the Battle of Guadalcanal.
Nevertheless, the campaign continued with the Japanese advancing steadily south along the Kokoda Track. The two sides clashed again around Deniki between 13 and 14 August, during which the Australians were able to concentrate three companies from the 39th Infantry Battalion – 'C', 'D' and the newly arrived 'E' Company – across the track. Amidst a torrential downpour, Tsukamoto's troops launched a frontal attack, concentrating on the Australian left flank where the inexperienced 'E' Company under Captain William Merritt, was located, while scouts moved around the flanks of the Australian position. Heavy fighting followed, but by mid-morning on 14 August, the Australians were nearly encircled and Cameron gave the order to break contact and withdraw by platoons. This was completed in good order, but a large amount of supplies and personal belongings were abandoned.
As veteran Second Australian Imperial Force formations including Brigadier Arnold Potts' 21st Brigade arrived from Australia to reinforce Maroubra Force, the first major action of the campaign took place around Isurava. This was followed by actions around Templeton's Crossing, Efogi and Ioribaiwa as the Japanese penetrated as far south as Imita Ridge, which was only a short distance from Port Moresby. In late September and early October, after reverses around Milne Bay and Guadalcanal, the Japanese went onto the defensive as the strategic situation in the Pacific began to turn against them, and the Australians were able to launch a cautious counter-attack which saw them retake Kokoda unopposed on 2 November 1942. Finding the airstrip in a state of disrepair, the Australians began efforts to reopen the airstrip. As supplies began to arrive, the logistical burden of trekking supplies up the track was alleviated and the Allied counter offensive picked up pace. This was followed by heavy fighting around Oivi and Gorari, which proved to be the final action of the Kokoda Track campaign prior to the Battle of Buna–Gona as the Japanese were pursued back towards their beachheads on the northern Papuan coast.
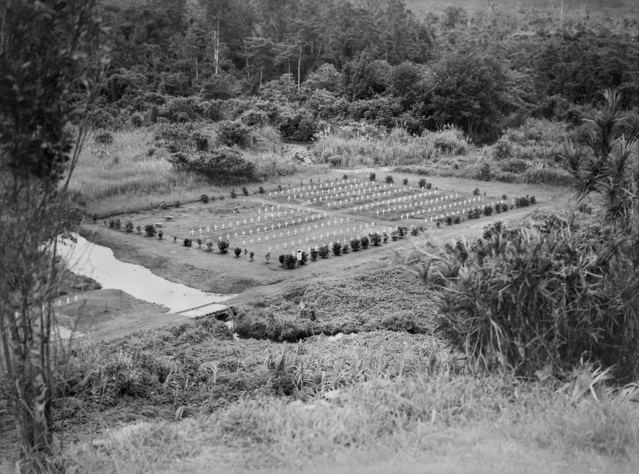
After the war, a battle honour was awarded to Australian units for their involvement in the fighting around Kokoda and Deniki during late July and early August. This was designated "Kokoda – Deniki", and was awarded to the 39th Infantry Battalion and the Pacific Islands Regiment, which was the successor to the Papuan Infantry Battalion.