
 | ||
Similar Gallipoli Campaign, Battle of the Nek, Battle of Hill 60, Battle for No3 Post, Battle of Sari Bair | ||
The Battle for Baby 700 (2/3 May 1915), was an engagement fought during the Gallipoli Campaign of the First World War. Between the forces of the British Empire and the Ottoman Turkish Empire.
Contents
On 25 April 1915, the Australian and New Zealand Army Corps (ANZAC), conducted an amphibious landing on the Gallipoli Peninsula. The landing at Anzac Cove was supposed to capture Baby 700, on the third ridge from the Adriatic coast on the first day, but Turkish opposition being stronger than expected foiled their plans and they were forced to form a defensive perimeter on the second ridge. Having successfully defended against a Turkish counter-attack on 27 April, they realised it would strengthen their position if they captured Baby 700. The operation was given to the New Zealand and Australian Division, their then strongest formation, supported by the 1st Royal Naval Brigade.
The failure did not stop the ANZACs from trying again. In August 1915, in conjunction with the Landing at Suvla, they attacked again. This time with some limited success, but the deception raids notably at The Nek and Lone Pine, resulted is severe casualties.
Background
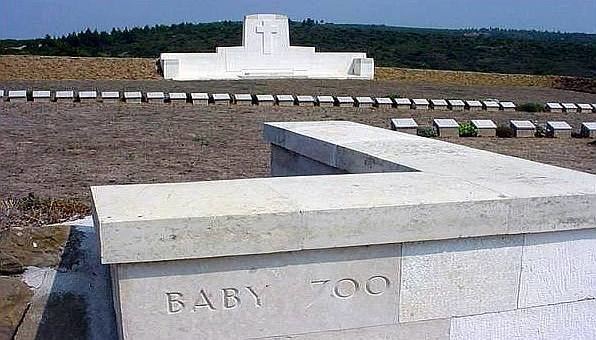
Baby 700 is a hill in the Sari Bair range, between Russell's top and Battleship Hill. It was named after its supposed height above sea level, but its actual height was only 590 feet (180 m). The most direct route to there from the present ANZAC lines was a distance of 350 yards (320 m) from Russell's Top through The Nek, a twenty yards (18 m) piece of high ground between Malone's Gully to the north and Monash Valley to the south.
During the Landing at Anzac Cove Baby 700, was supposed to have been secured by the 3rd Australian Brigade. However heavy Turkish resistance, had forced the brigade commander, Colonel Ewen Sinclair-Maclagan, to instead stop and form a defence line on the Second Ridge. Unfortunately this left Baby 700 in Turkish hands, providing them with a dominant position overlooking the ANZAC beachhead. That and their other positions at Russell's Top, The Nek and the head of Monash Valley, provided them with a distinct advantage, over the ANZACs. To such an extent that the ANZAC posts along the south-west side of Monash Valley, (Quinn's, Steel's, Courtney's) had Turkish trenches to their front and rear.
When they landed over the night of 25/26 April, the 4th Australian Brigade had occupied the posts along Monash Valley. The men defending Quinn's Post were overlooked from the Chessboard on the left, and from the German officers' Ridge to the right and the Turkish lines were only fifty yards (46 m) to their front. While the men at Pope's Hill on the opposite slope of Monash Valley, had Turkish positions along Dead Man's Ridge only one hundred yards (91 m) to their rear. At this early stage of the campaign the ANZACs lines were a series of intermittent trenches and posts with large gaps between them which allowed Turkish snipers to daily infiltrate their rear areas. To make the positions around Monash Valley safe it was decided that Baby 700 and those positions overlooking the valley had to be captured.
Intention
The initial plans called for a large scale assault on 30 April, that would capture of all of 400 Plateau in the south, along Mortar Ridge to Baby 700, then along the seaward slopes to the coast in the north. The 1st New Zealand Brigade, in the north, the 4th Australian Brigade, in the centre, and the 1st Australian Brigade, in the south, would carry out the assault. Brigadier-General Harold Walker, commanding the 1st Australian Brigade, knowing the country and the state of his troops, was doubtful it would succeed. He asked the commander of the 1st Australian Division, Major-General William Bridges, to come forward and observe the situation for himself. Bridges agreed and advised the corps commander Lieutenant-General William Birdwood and after a staff conference the operation as it stood was cancelled.
The attack was modified the objective was now to capture Baby 700, the New Zealand and Australian Division, commanded by Major-General Alexander Godley, would conduct the assault at 19:30 on 2 May. The 4th Australian Brigade, were responsible for capturing the territory from Quinn's Post to the summit of Baby 700. At the same time the 1st New Zealand Brigade would capture the territory between the summit and the sea to the north. A naval gunnery and field artillery bombardment of Baby 700 would begin thirty minutes before the start of the attack. Followed ten minutes later by the corps machine-guns opening fire. At 19:15 the bombardment changed targets onto Battleship Hill and Chunuk Bair. The approach route for the attacking troops was up Monash Valley. The 1st Royal Naval Brigade would support the attacking forces. From north to south the initial assault battalions were the New Zealand Otago, the 13th Australian and the 16th Australian.
Initial attacks
At 19:15 as the bombardment lifted, the 16th Battalion climbed out of Monash Valley and as they cleared the ridge, came under heavy Turkish small arms fire, from The Nek and the Chessboard, to their rear. Advancing a few yards the battalion started digging in, extending the forward trench of Quinn's Post. Another section of the battalion occupied an abandoned Turkish trench five yards (4.6 m) from the opposite crest, and the rest of the battalion fought and extended their trenches through the night. However supplying the forward troops was difficult during the night and impossible during daylight, with the Turkish machine-guns firing from their rear. At daylight the Australians charged another Turkish trench about eighty yards (73 m), Turkish machine-guns on Baby 700 opened fire and forced them back. The Turks started moving forwards towards the Australians trench, when around 05:00 an shell from an ANZAC battery landed behind them and part of the 16th Battalion withdrew back to their start position.
The 13th Battalion in the centre, could only initially advance in single file due to the nature of the country. The head of the battalion led by Captain James Durrant reached the slope of the chessboard undetected, he stopped and counted 250 men, then ordered a right turn and advanced and captured a Turkish trench. While part of the remainder of the battalion continued towards the chessboard. A guide left in the valley had been killed and one platoon, with no one to direct them, went to assist the 16th Battalion, who were calling for reinforcements. Another platoon missed the turning, continued up the valley and were never seen again. Durrant waiting for the rest of the battalion, returned to the valley in time to direct the remainder along the correct route. The battalion were now in a position to continue the attack, but there was no signs of the New Zealanders. While they waited the dig a trench system on Dead Man's Ridge, but during the night they had lost two hundred men.
The Otago Battalion located on Walker's Ridge, had to move down to the north beach then south into Monash Valley to get into position to start the attack, a distance of around 1.5 miles (2.4 km) and it was not until 20:45 that they reached their start point. They climbed out if the valley to the left of Pope's Post, but by now the Turks were ready and opened fire of them. The New Zealanders made several attempts to move beyond the crest and eventually established a rough defence line at the foot of the chessboard. There was however a gap between the New Zealanders and the 13th Battalion, which was filled at midnight by a company from the 15th Australian Battalion. But like the other assault battalions they were short of where they were supposed to be by now, The Nek, Baby 700 and the head of Monash Valley were still held by the Turks.
Follow up attacks
Somehow Godley believed the attacks had been partially successful and with a little extra effort they could achieve their objective. So he instructed both brigade commanders to sent more troops to support the attack.
At 23:00 a company from the Canterbury Battalion, left their trench on Walker's Ridge and headed towards The Nek. Encountering heavy fire from the Turkish positions they returned to their own trenches. So Colonel Francis Johnston the brigade commander ordered the whole Canterbury Battalion to try again, but the second attempt also failed. At 03:00 the battalion was ordered down into Monash Valley to help the Otago Battalion dig in and construct communications trenches, the leading troops reaching them an hour later. They were directed to extend the left of the Otagos trench at the foot of the Chessboard. At daylight the Turks could seen along the Otago trench and opened fire, forcing the battalion and the company from the 15th Battalion back into cover.
At 01:35 Godley assigned two Royal Marine Light Infantry battalions to Colonel John Monash as the 4th Australian Brigade reserve. But the battalions heading up Monash Valley, by now crowded with wounded, did not arrive until dawn. Soon after when part of the 16th Battalion came running back from the front line some of the marines went with them. When order was restored, it was daylight and the marines went forward to support the remainder of the 16th Battalion. Caught in the open by Turkish machine-guns to their front and rear, they were forced back. Left on their own and exposed to Turkish fire, small groups, of the 16th Battalion started back. Until eventually the Turks occupied their trench.
The Royal Naval Nelson Battalion moved forward to support the 13th Battalion, and as they approached the front line they took the digging Australians for Turks and opened fire on them, until Durrant managed to get them to stop. They then moved into the line to the right of the 13th Battalion.